menu icon
go to homepage
  • Recipes
  • Thanksgiving
  • Fall Recipes
  • About Liz
  • Subscribe
  • Let's Work Together!
    • Email
    • Facebook
    • Instagram
    • Pinterest
    • Twitter
  • subscribe
    search icon
    Homepage link
    • Recipes
    • Thanksgiving
    • Fall Recipes
    • About Liz
    • Subscribe
    • Let's Work Together!
    • Email
    • Facebook
    • Instagram
    • Pinterest
    • Twitter
  • ×
    Flour de Liz » Recipes » Brownie + Bar Recipes

    Fruity Pebbles Treats

    Modified: Jun 12, 2024 · Published: Jun 19, 2023 by Liz Pollio · This post may contain affiliate links · Leave a Comment

    • Facebook
    • Threads
    • Bluesky
    • SMS
    • Email
    Jump to Recipe Print Recipe
    Fruity Pebbles Treats pin for Pinterest.

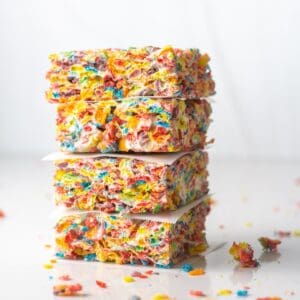
    Rice Krispie Treats are such a simple no-bake treat, but this super easy recipe takes these classic cereal bars to a whole new level! Combining Fruity Pebbles with ooey gooey melty marshmallows is so easy and even more delicious! These Fruity Pebbles Treats come together in a matter of minutes with just three simple ingredients.

    Squares of Fruity Pebbles bars slightly separated on a sheet of parchment.

    This cereal bars recipe is a perfect afternoon snack, or even a great breakfast - I mean, it's cereal! These Fruity Pebbles Treats are also super easy to package up for a gift or bake sale, a picnic or a school lunch box, and the fun and bright colors make them stand out from traditional Rice Krispie Treats. If your prefer to use Rice Krispies, you'll also enjoy these Maple Rice Krispie Treats or these Nutella Rice Krispie Treats.

    Jump to:
    • Why this recipe works
    • Ingredients and notes
    • Substitutions
    • How to make this recipe
    • Recipe FAQs
    • Tips & Tricks
    • Storage Tips
    • Related Recipes
    • 📖 Recipe
    • 💬 Comments

    Why this recipe works

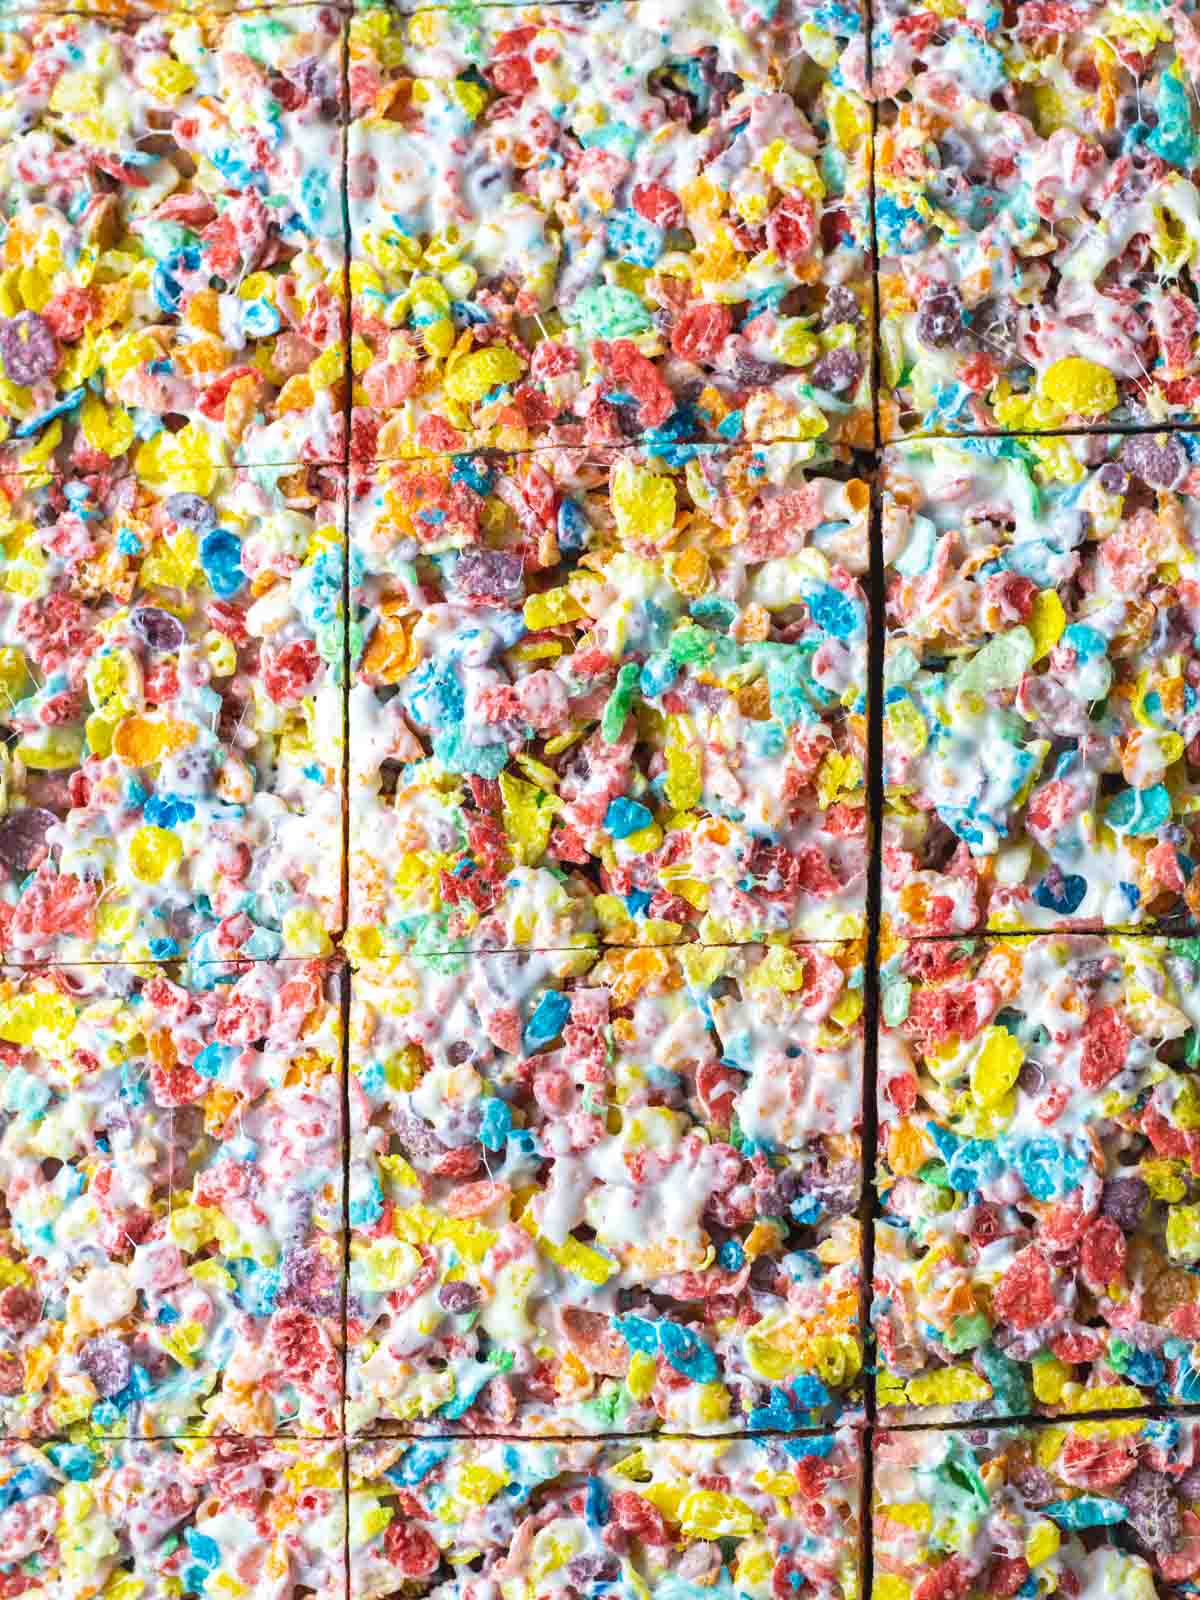
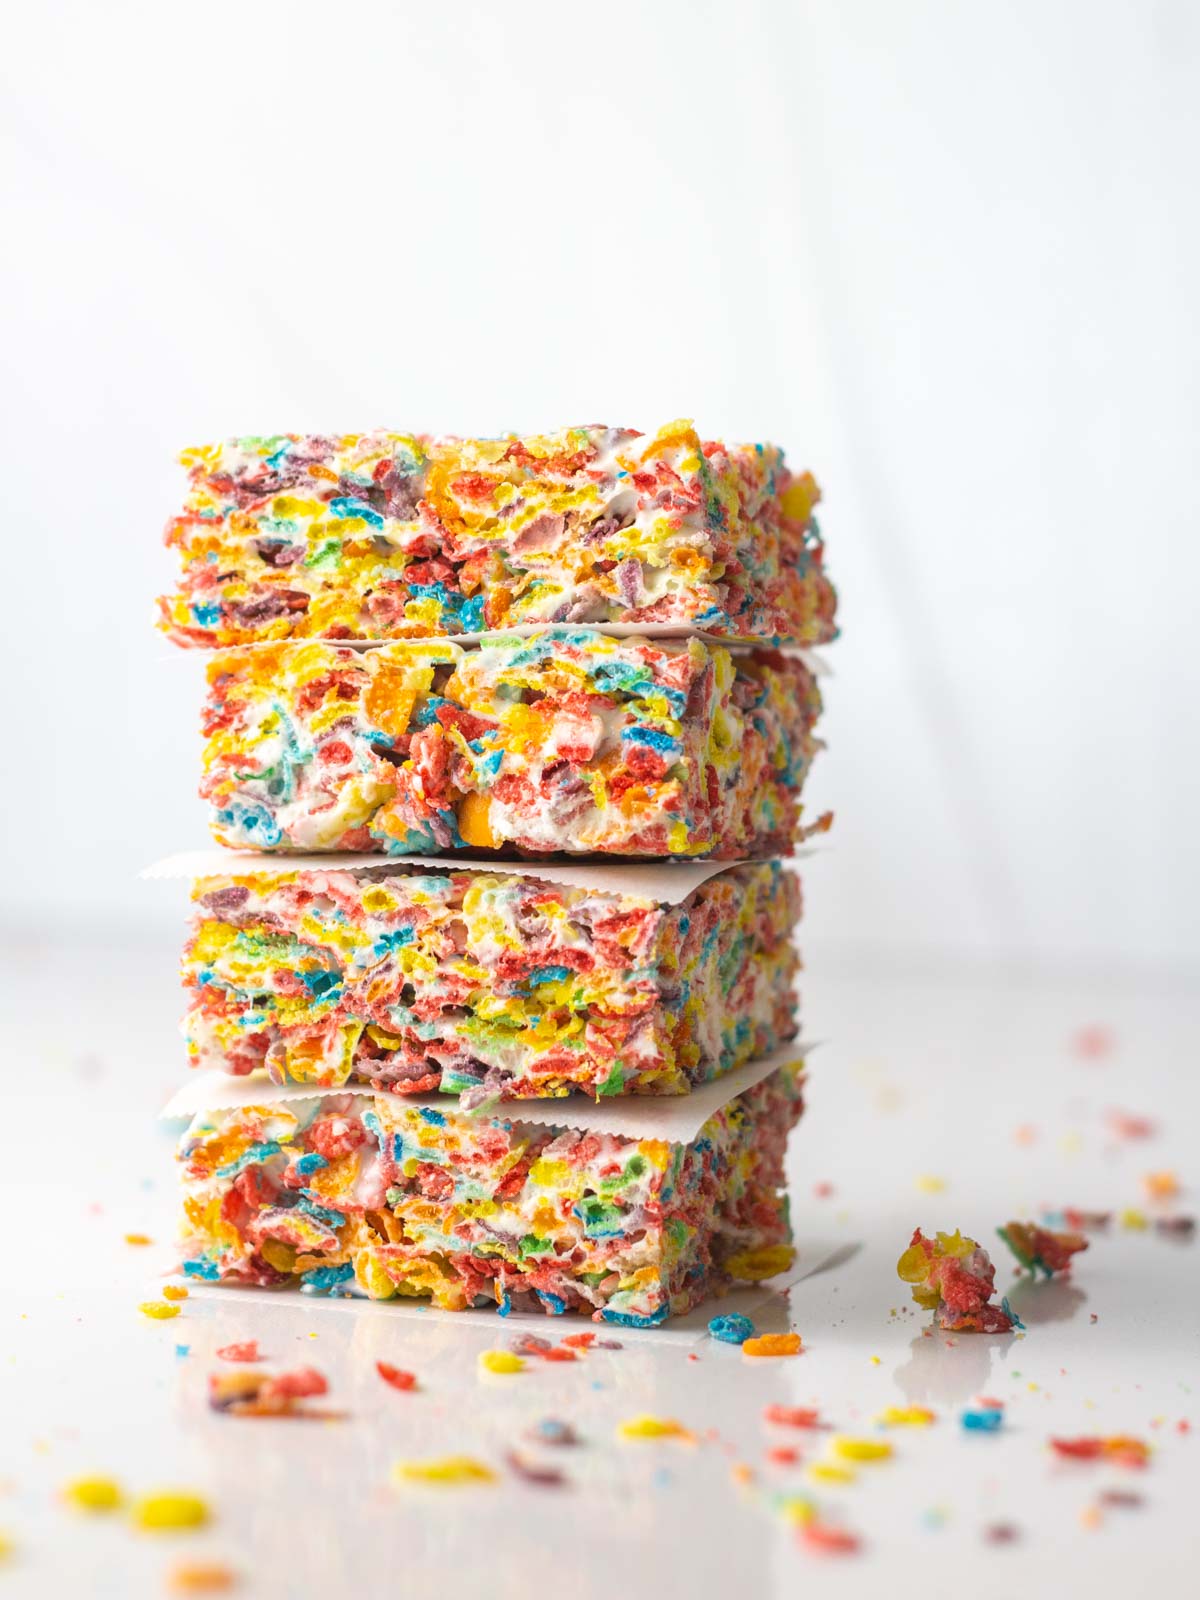
    These fluffy, chewy Fruity Pebbles bars combine all the best parts of childhood. The sweet and fruity cereal is held together by marshmallows melted with butter, creating an ooey gooey and colorful nostalgic treat! Plus, they are easy enough that the kids can even help make them!

    Ingredients and notes

    The three ingredients needed to make Fruity Pebbles Treats.

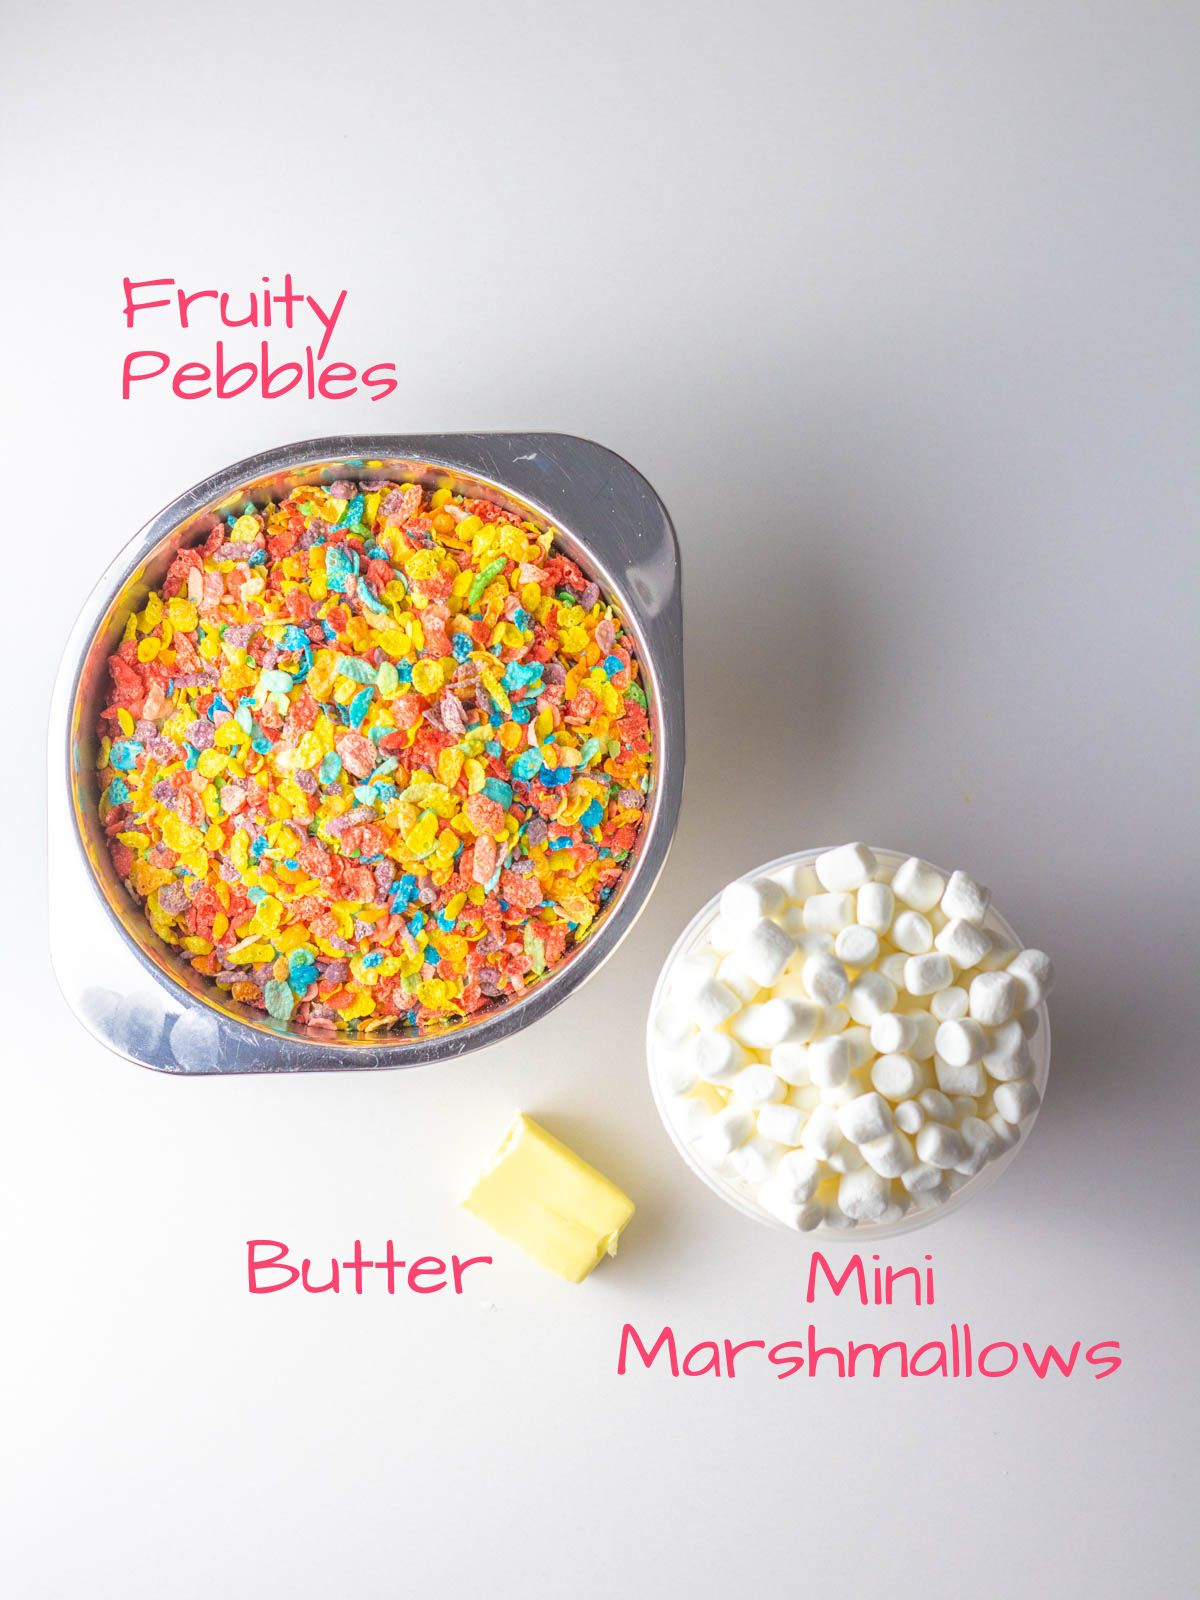
    Mini Marshmallows - The mini marshmallows melt more easily than larger marshmallows will. Ensure you are using fresh marshmallows. If they are stale they will not melt properly.

    Butter - The butter contributes to both the flavor and texture of these homemade no-bake treats. It also helps the marshmallows melt smoothly.

    Fruity Pebbles - The cereal gives these easy rainbow marshmallow treats their primary flavor. Plus, Fruity Pebbles are gluten-free making this three-ingredient recipe perfect for those with gluten allergies or sensitivities.

    Substitutions

    Mini Marshmallows - Larger marshmallows will work for this too. Marshmallow Creme or Fluff will also work, but will likely not hold the shape of bars so while it will taste good, you may just have to dig straight into the Fruity Pebbles Treats with a fork!

    Butter - Coconut oil can replace butter to make this easy dessert dairy-free. It may slightly change the taste, giving a hint of coconut flavor, but should still be delicious!

    Fruity Pebbles - Any cereal can be substituted here! I love using Fruity Pebbles because the flavor works so well with the marshmallow. Plus, I love the pop of color! Cocoa Pebbles would also be a delicious chocolate version of these Pebbles bars. If you prefer a chocolate coconut cereal treat you will also love these No-Bake Coconut Cocoa Pebbles Treats!

    These Fruity Pebbles Treats will be sweeter than your classic Rice Krispie Treats so if these are too sweet for your liking, you can replace half of the Fruity Pebbles with Rice Krispies. These cereal bars will still have the bright fun colors and the sweet fruity flavor, but the Rice Krispies will help balance out the sweetness a bit.

    How to make this recipe

    Glass 13x9 baking dish lined with parchment paper held in place with colorful binder clips.

    Step 1: Line a 9x13 baking dish with parchment paper.

    Mini marshmallows and butter in a saucepan.

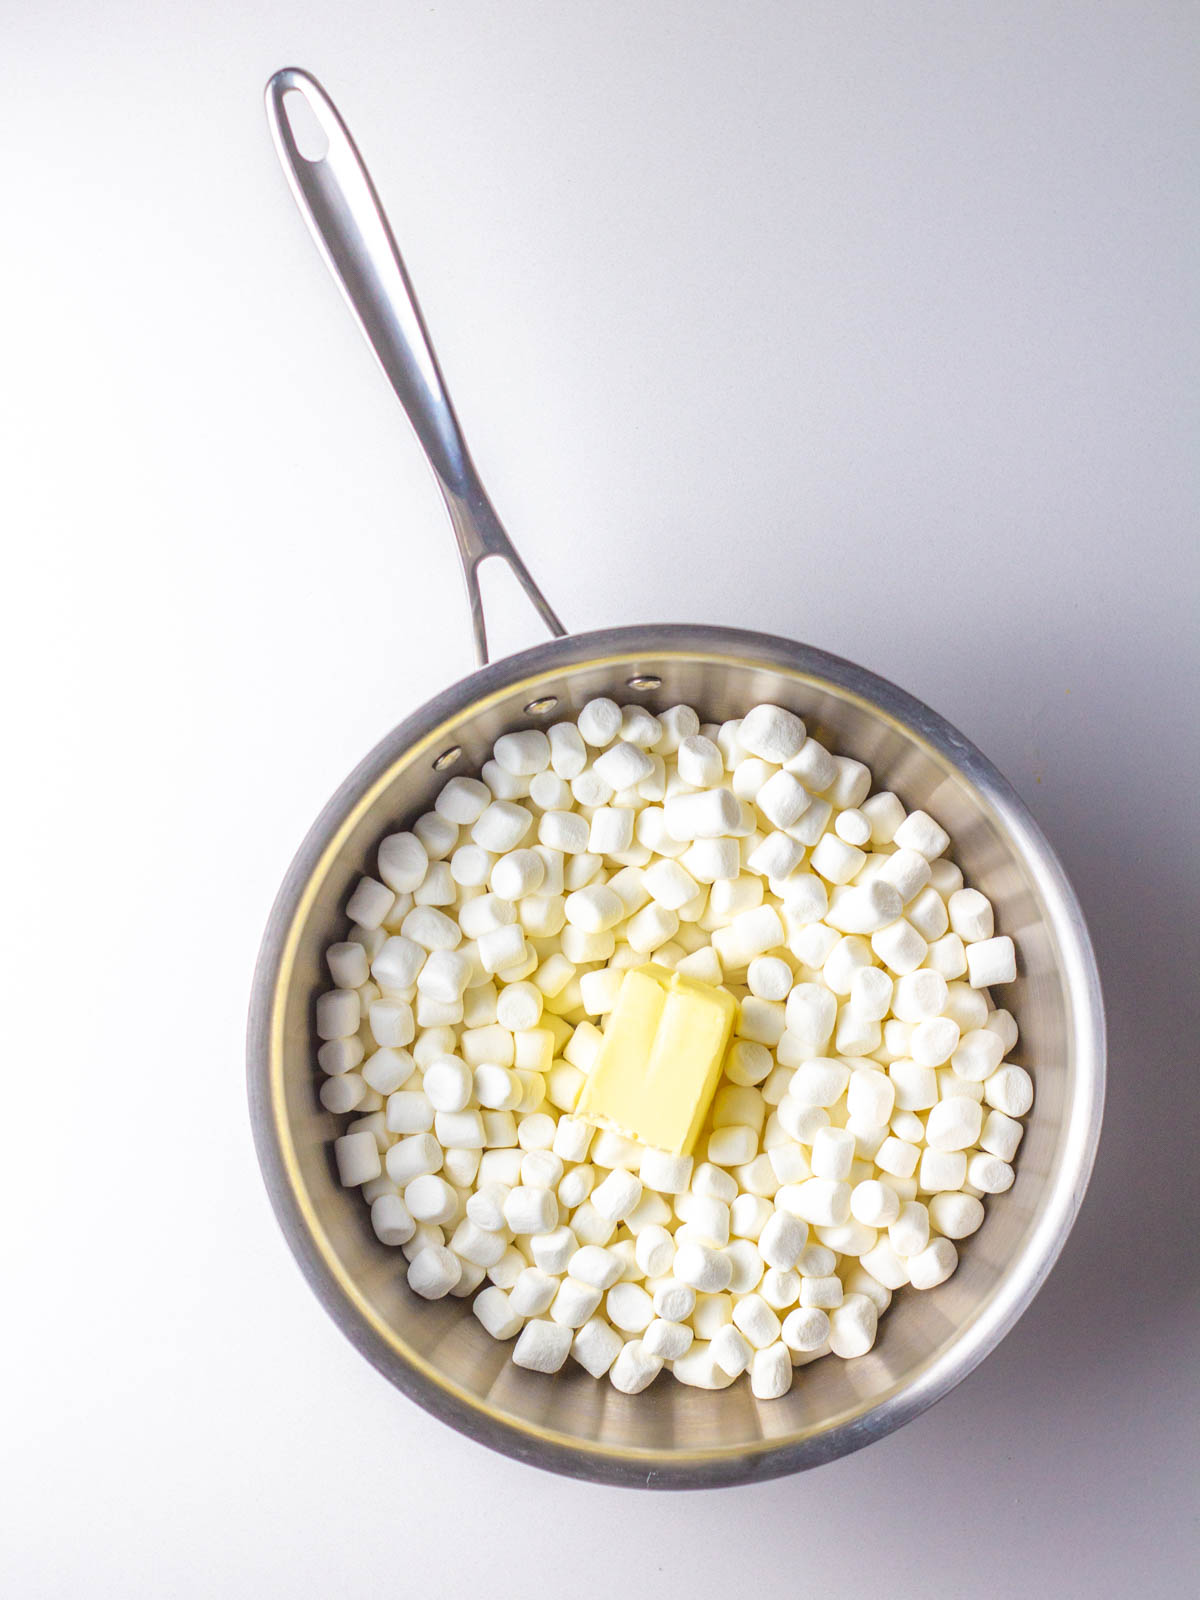
    Step 2: Heat the marshmallows and butter over medium-low heat, stirring frequently, until almost melted. Remove from heat and continue stirring until melted and smooth.

    Fruity Pebbles stirred into melted marshmallow in a saucepan with fruity pebbles spilled around the outside of the pot.

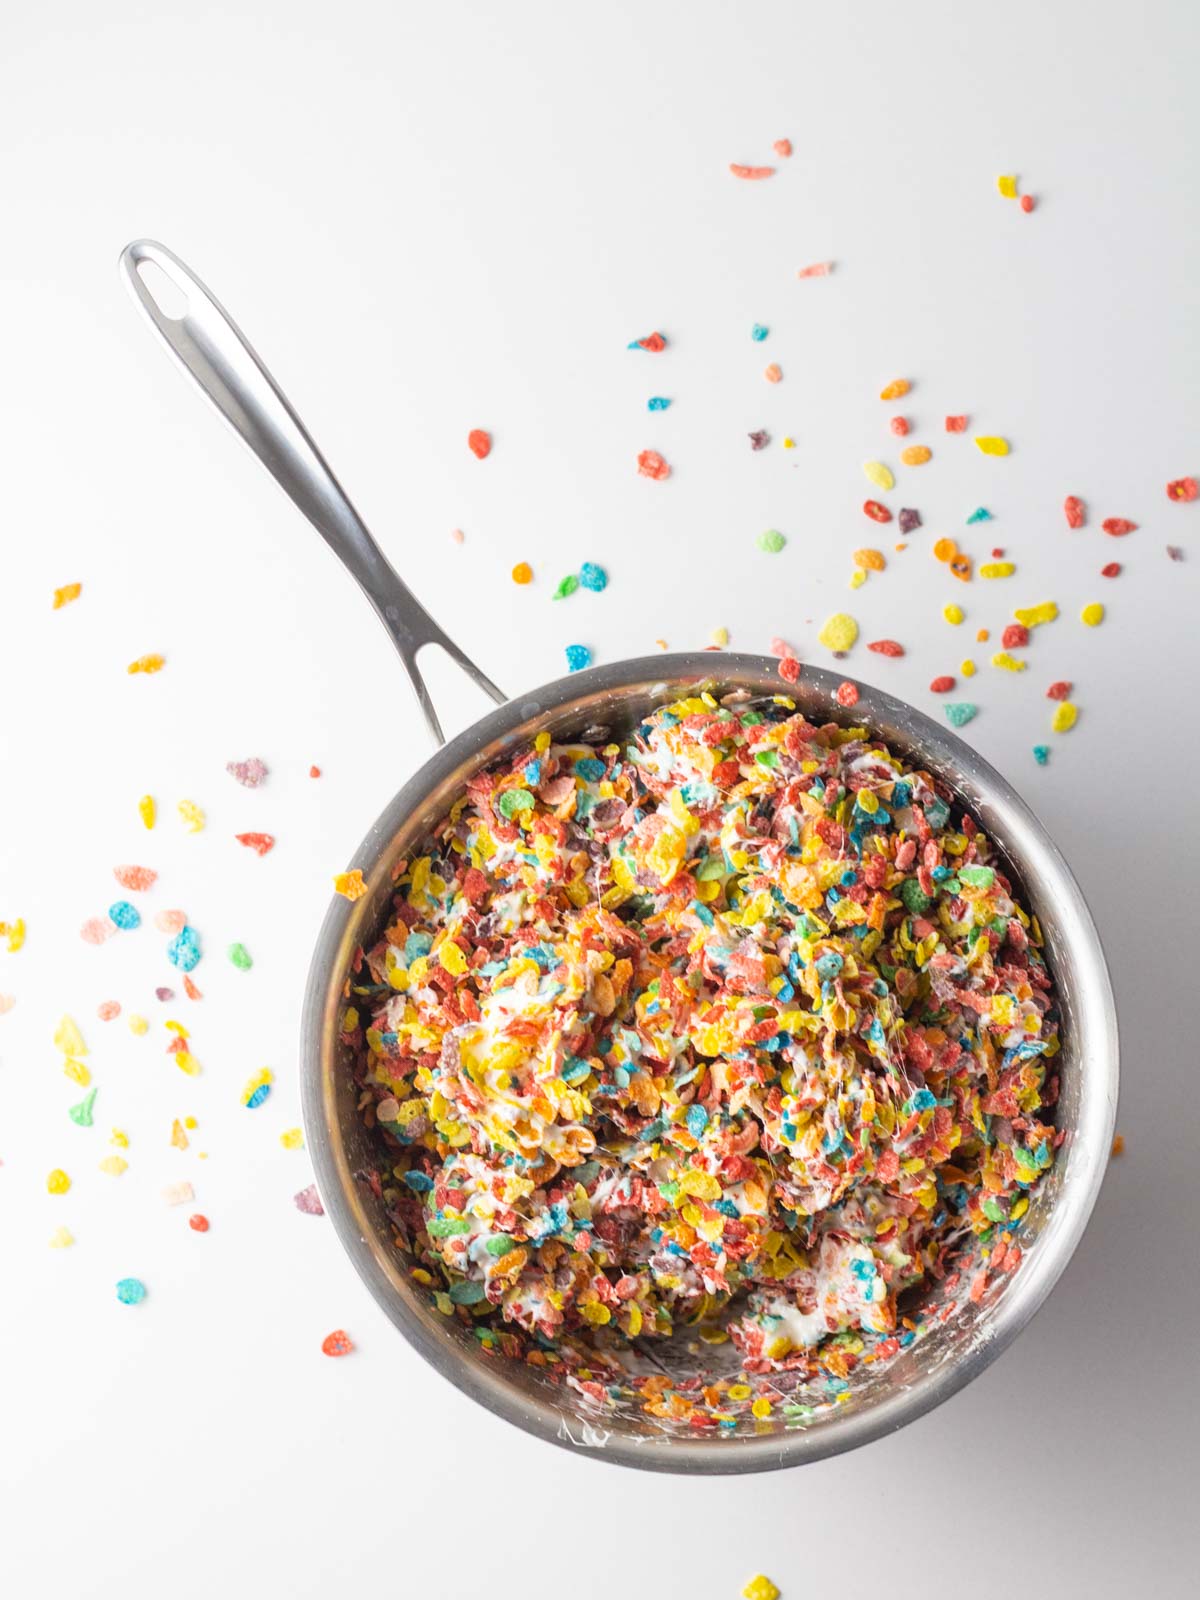
    Step 3: Stir the Fruity Pebbles into the melted marshmallow mixture.

    The Fruity Pebbles and marshmallow mixture pressed into a lined 9x13 glass baking dish.

    Step 4: Spread into the lined pan and let set.

    Close up of the dish of Fruity Pebbles treats in the baking dish with knife cuts creating squares.

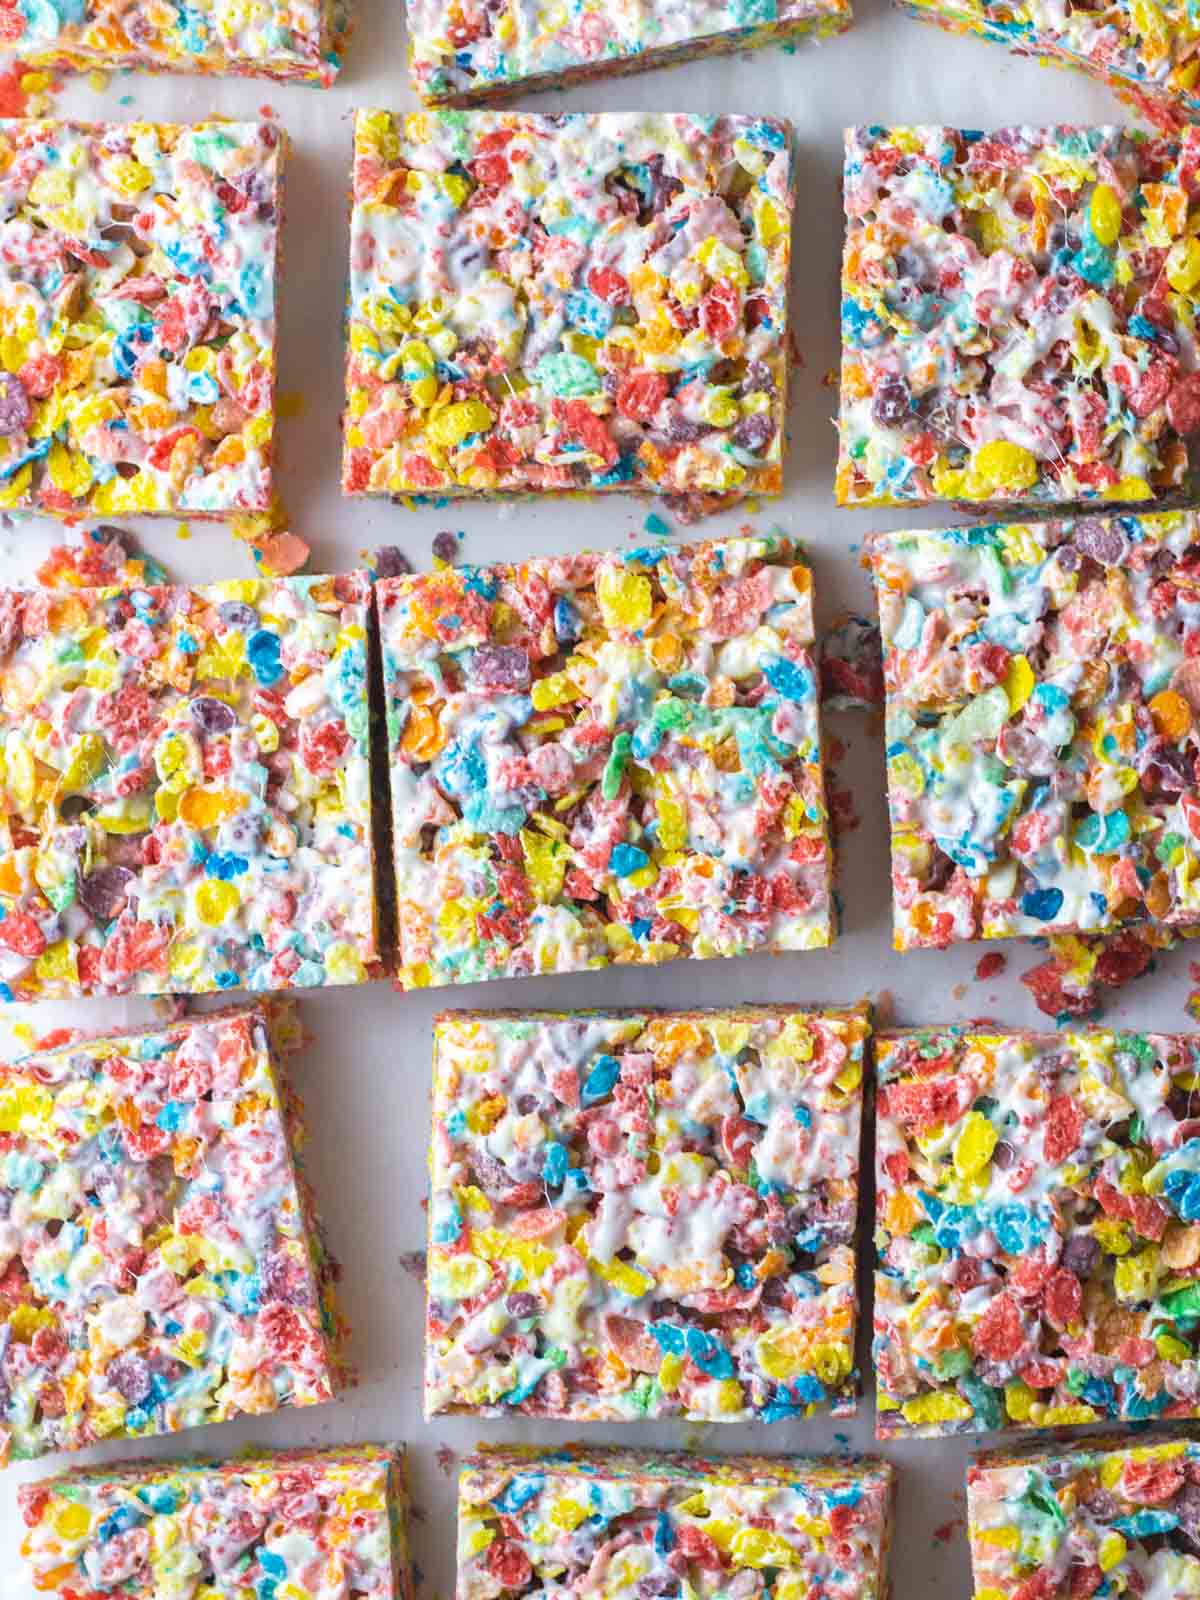
    Step 5: Cut into squares and enjoy!

    Square Fruity Pebbles Bars with half of each bar dipped into white chocolate.

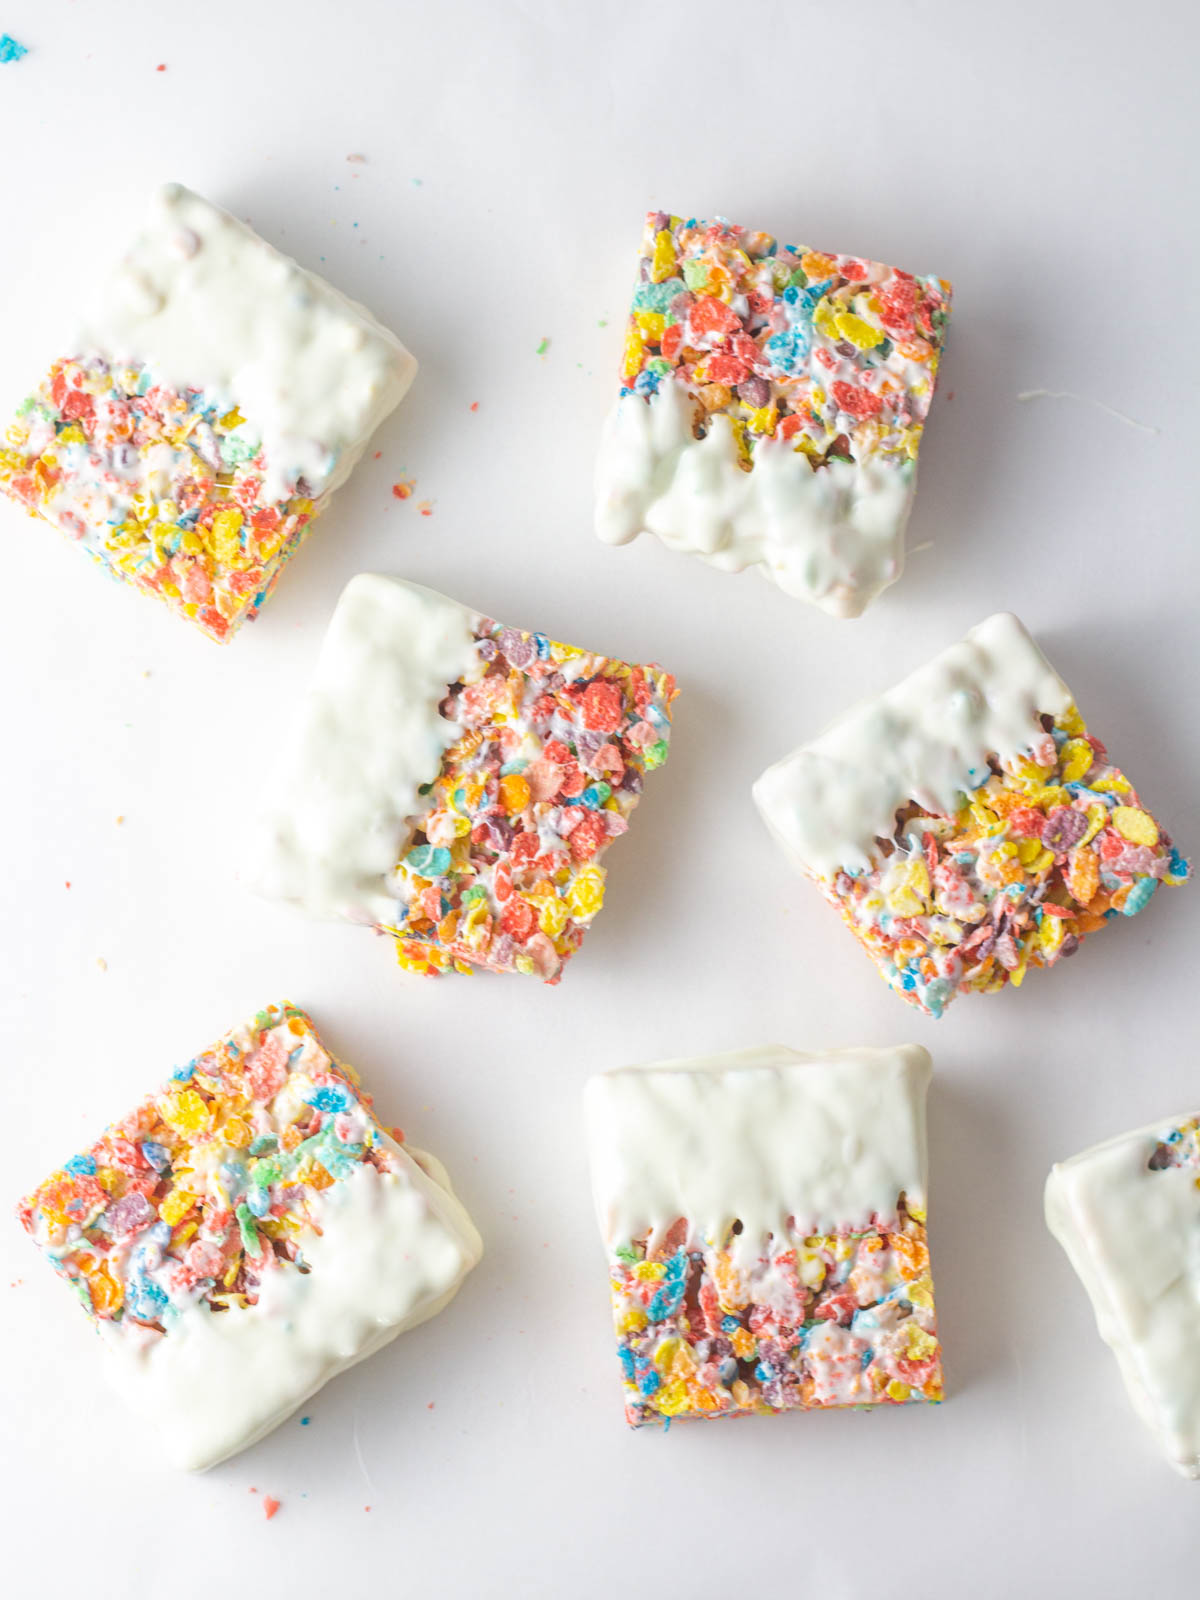
    Step 6: For an extra sweet treat, dip the bars into melted white chocolate.

    Recipe FAQs

    Are Fruity Pebbles rice cereal?

    Yes! Fruity Pebbles are fruity flavored rice cereal. This means they are gluten free making these Fruity Pebbles Cereal bars, unlike Rice Krispie Treats, gluten free!

    Can I use a different sized pan?

    Yes! For thicker Fruity Pebbles Cereal Bars, you can instead use an 8x8 pan. Alternatively, this simple one-bowl recipe can be made in two 8x8 pans for easy rainbow marshmallow treats that are about an inch thick (as pictured).

    Why are my Fruity Pebbles Treats hard?

    If your Fruity Pebbles bars are freshly made and they're hard, it may be because they were pressed into the pan too firmly. While you want the cereal to stick to the marshmallows to form bars, you don't want to pack them into the baking dish or they will be hard to bite into! Be sure to just lightly press them into the pan.

    Overcooking the marshmallows or melting them at too high of a heat may also result in hardened cereal treats.

    If you made these Fruity Pebbles bars a few days ago, they may be stale. If you made them more recently, your airtight container may not have been well-sealed.

    A stack of 4 Fruity Pebbles Bars each separated by a square of parchment paper.

    Tips & Tricks

    Tip #1: To melt the butter and marshmallows using the microwave, heat in a large microwave-safe bowl for 45 seconds and then stir. Continue heating in 15 second increments, stirring after each, until melted and smooth.

    Tip #2: To hold the parchment paper in place, use binder clips to clip it to the edges of the baking dish (see photo above in the How to Make this Recipe section).

    Tip #3: Using parchment paper allows you to make this no-bake cereal bar recipe without the Fruity Pebbles Treats sticking to the pan. In place of parchment paper, you can butter the pan. If using non-stick spray, spray lightly to avoid soggy cereal bar bottoms and to avoid tasting the spray.

    Tip #4: A silicone spatula should be fairly non-stick, but if you're having trouble spreading the marshmallow and cereal mixture, you can use a piece of wax paper to help gently press the marshmallow cereal mixture into the pan. Alternatively, you can very lightly spray your spatula with non-stick spray. Spraying the spatula with non-stick spray will also help if your spatula is sticking while stirring the cereal into the melted marshmallows.

    Tip #5: Let these no-bake marshmallow bars set completely before cutting into squares to ensure they stick together and hold their shape.

    Storage Tips

    These Fruity Pebbles Treats can be stored in an airtight container at room temperature for 3-5 days.

    Related Recipes

    • A straight-on side view of a stack of three lucky charms treats.
      Lucky Charms Treats
    • A hand reaching to a bowl of cinnamon toast crunch puppy chow sitting on a blue napkin.
      Cinnamon Toast Crunch Puppy Chow
    • Close up of two oat flour macarons stacked with another on its side next to the stack.
      Nut-Free Macarons Using Oat Flour
    • Close up of the layers of a fluffernutter pie - bread crumb crust, peanut butter pie filling, marshmallow fluff topping
      Fluffernutter Pie

    Did you try this recipe?  Leave a review below, and tag @flourdeliz on Instagram!

    📖 Recipe

    A stack of 4 Fruity Pebbles Bars each separated by a square of parchment paper.

    Fruity Pebbles Treats

    Liz Pollio
    Fruity Pebbles cereal mixed with melted marshmallow creating a sweet and colorful cereal bar.
    5 from 2 votes
    Print Recipe Pin Recipe
    Prep Time 8 minutes mins
    Set time 30 minutes mins
    Total Time 38 minutes mins
    Course Breakfast, Dessert, Snack
    Cuisine American
    Servings 15 bars
    Calories 151 kcal

    Equipment

    • large saucepan or microwave-safe bowl
    • silicone spatula
    • 9x13 baking dish

    Ingredients
      

    • 6 cups mini marshmallows 10 oz bag
    • 4 tablespoons butter
    • 6 cups Fruity Pebbles 11 oz box

    Instructions
     

    • Line a 9x13 baking dish with parchment paper.
    • Melt butter and marshmallows in a large saucepan over medium-low heat, stirring frequently. Remove from heat when almost melted and stir until smooth. Alternatively, this can be done in the microwave (see notes).
    • Stir in cereal.
    • Spread into pan and let set.
    • Cut into squares and enjoy!
    • Optional: Dip squares into melted white chocolate and let set.

    Notes

    To melt the marshmallows and butter in the microwave, heat for 45 seconds then stir. Continue microwaving in 15-20 second increments, stirring between each, until smooth.
    In place of lining the pan with parchment paper, you can butter the pan.
    Wax paper can be used to gently press the marshmallow cereal mixture into the pan without it sticking to your hands. Do not press firmly!
    Let the bars set completely before cutting or they may fall apart.

    Nutrition

    Calories: 151kcalCarbohydrates: 29gProtein: 1gFat: 4gSaturated Fat: 3gPolyunsaturated Fat: 0.1gMonounsaturated Fat: 1gTrans Fat: 0.1gCholesterol: 8mgSodium: 124mgPotassium: 13mgFiber: 0.1gSugar: 16gVitamin A: 493IUVitamin C: 4mgCalcium: 5mgIron: 1mg

    Nutrition information is automatically calculated so should only be used as an estimate. Accuracy is not guaranteed.

    Tried this recipe?Let us know how it was!

    More Dessert Bars

    • A close-up side view of a peanut butter marshmallow square with more bars surrounding it.
      Peanut Butter Marshmallow Squares
    • A top down view of a batch of peanut butter and jelly bars sliced into 9 squares and each just slightly separated from each other with the squares around the edges going out of frame.
      Peanut Butter and Jelly Bars
    • A stack of three Biscoff blondies with additional blondies next to and behind the stack.
      Biscoff Blondies
    • A close-up top down view of a peppermint mocha brownie on its side showing the middle peppermint bark layer surrounded by the rest of the batch of brownies.
      The Fudgiest Peppermint Mocha Brownies
    • Facebook
    • Threads
    • Bluesky
    • SMS
    • Email

    Comments

    No Comments

    5 from 2 votes (2 ratings without comment)

    Did you make this recipe? Let me know what you think! Cancel reply

    Your email address will not be published. Required fields are marked *

    Recipe Rating


    This site uses Akismet to reduce spam. Learn how your comment data is processed.

    Here you'll find a fun and welcoming baking space without any judgement. Whether you're new to baking, or have just a few minutes or a tiny kitchen, these recipes are designed to be simple and approachable!

    Liz wearing a pink apron leaning on a counter with her chin on her palm.

    Hi, I'm Liz!

    I started creating my own recipes when I realized that baking blogs usually shared complicated and time-consuming recipes that needed a lot of kitchen equipment and a lot of ingredients. When my grandma mentioned that I should write a cookbook, that inspired me to turn my super simple recipes into a blog. As much as I love to make these super simple recipes for my friends and family, I also love being able to share them with you!

    Learn more about me!

    The Easiest Thanksgiving Desserts!

    • A cranberry white chocolate cookie cut in half with the two halves stacked on top of eachother and the inside of each half showing, surrounded by the rest of the cookie batch.
      White Chocolate Cranberry Cookies
    • A frosted maple cupcake in front of the rest of the batch of maple cupcakes.
      Maple Cupcakes with Maple Buttercream Frosting
    • A slice of bourbon pumpkin pie with a dollop of whipped cream on top.
      Bourbon Pumpkin Pie
    • A partially sliced bourbon sweet potato pie with a dollop of toasted meringue on each slice.
      Southern Sweet Potato Pie
    • A hand holding a slice of sweet potato pie on a pie server over the rest of the pie.
      Sweet Potato Pie with Graham Cracker Crust
    • A hand sticking a rose gold fork into a slice of frosted sweet potato cake.
      Easy Sweet Potato Cake with Marshmallow Frosting

    See more Thanksgiving Recipes →

    Trending Recipes

    • The bottom left corner of a 9x13 baking dish of peach cobbler with a serving spoon with a green handle sticking out of the dish.
      Peach Cobbler with Cake Mix
    • angled view of cookie cake with alternating brown and white frosting dots around the outside, and one slice pulled out part-way and angled. Multi-colored sprinkles are on the cookie as well as the marbled surface the cookie is on.
      Chocolate Chip Cookie Cake
    • Close up of two oat flour macarons stacked with another on its side next to the stack.
      Nut-Free Macarons Using Oat Flour
    • A sliced batch of red velvet brownies with the center brownie sideways to show the inside.
      Simple 3 Ingredient Red Velvet Brownies using Cake Mix
    • A bowl of Nutella Whipped Cream in a small white bowl on a brown cutting board.
      Two Ingredient Nutella Whipped Cream
    • A hand reaching to a bowl of cinnamon toast crunch puppy chow sitting on a blue napkin.
      Cinnamon Toast Crunch Puppy Chow

    Footer

    ↑ back to top

    About

    • About Liz
    • Privacy Policy
    • Terms of Use
    • Accessibility Policy

    Newsletter

    • Subscribe to my monthly newsletter

    Let's Connect!

    • Work with me
    • Contact me

    Copyright © 2016-2025 Flour de Liz, LLC

    Rate This Recipe

    Your vote:


    A rating is required
    A name is required
    An email is required

    Recipe Ratings without Comment

    Something went wrong. Please try again.