• Skip to main content
  • Skip to primary sidebar

Flour de Liz

menu icon
go to homepage
  • Recipes
  • Summer Recipes
  • About Liz
  • Subscribe
  • Let's Work Together!
    • Email
    • Facebook
    • Instagram
    • Pinterest
    • Twitter
  • subscribe
    search icon
    Homepage link
    • Recipes
    • Summer Recipes
    • About Liz
    • Subscribe
    • Let's Work Together!
    • Email
    • Facebook
    • Instagram
    • Pinterest
    • Twitter
  • ×
    Flour de Liz » Recipes » Brownie + Bar Recipes

    Published: Feb 28, 2017 · Modified: Sep 26, 2021 by Liz Pollio · 2 Comments

    Maple Rice Krispie Treats

    • Facebook
    • Threads
    • Bluesky
    • SMS
    • Email
    Jump to Recipe Print Recipe
    Flour de Liz » Recipes » Brownie + Bar Recipes

    I absolutely love anything maple.  Living in New England I am constantly enticed by various maple items from lattes to meats (yep!) to donuts. I've tried them all, and they're always delicious.  Maple just makes everything better which is why I had to make these Maple Rice Krispie Treats! These flavored Rice Krispie Treats are made with homemade maple marshmallows, but take less than an hour until you can bite right in!

    A stack of 3 maple rice krispie treats on a white marbled surface in front of a grey background and a few more maple rice krispie treats in a single layer

    Why this recipe works

    This easy recipe for Rice Krispie Treats follows my recipe for Maple Marshmallows, but instead of pouring the ooey-gooey marshmallow mixture into a pan to let it set into a marshmallow texture, you pour the Rice Krispies cereal right into the marshmallow and press that mixture into a baking dish to set. The set time is much quicker because you're not forming a marshmallow that holds its shape and structure, but instead is holding together the cereal in its chewy, gooey form.

    Ingredients and notes

    Maple Syrup - This is, of course, the key flavor in this fall Rice Krispie Treats recipe. This is added into the marshmallow mixture to give these Maple Rice Krispie Treats a rich, maple flavor!

    Corn Syrup - Corn syrup makes the homemade marshmallow mixture sticky, gooey, and sweet, helping it hold the Rice Krispie cereal together to create a delicious bar treat! Homemade marshmallow definitely makes for the best homemade Rice Krispie Treats!

    Rice Krispies - Of course you need Rice Krispies to make Maple Rice Krispie Treats, but you can also use this maple marshmallow goodness with a gluten free rice cereal or any cereal that excites you! Lots of cereals will blend deliciously with the maple marshmallow flavor.

    How to make this recipe

    Marshmallow

    Step 1

    Line a 9x13 pan with parchment paper, wax paper, or non-stick foil.

    Step 2

    Put gelatin and first ½ cup water into a mixing bowl and set aside.

    Step 3

    Heat sugar, maple syrup, corn syrup, salt, another ½ cup of water covered over medium-high heat for approximately 5 minutes.

    Step 4

    Uncover and continue heating until the mixture reaches 240 F on a candy thermometer.

    Step 5

    Remove from heat.

    Step 6

    Begin beating the gelatin mixture with the whisk attachment of the mixer, and slowly stream in the syrup mixture.

    Step 7

    Increase the mixer to high speed (do this slowly to avoid splatter!) and beat an additional 10 minutes.

    Rice Krispie Treats

    Step 8

    Add in Rice Krispies and mix well with a greased silicone spatula.

    Step 9

    Spread evenly into prepared pan.

    Step 10

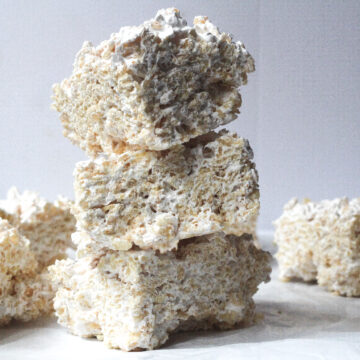
    Let set, then cut into bars.

    A hand placing a fourth rice krispie treat on a stack of three maple rice krispie treats in front of a white background

    Recipe FAQs

    Are these gluten free Rice Krispie Treats?

    Unfortunately, Rice Krispies no longer makes a gluten free cereal, however you can easily substitute Rice Krispies with a gluten free cereal and still have a delicious maple cereal treat.

    Can you freeze Rice Krispie Treats?

    You can freeze them for longer term storage, but make sure you defrost them before eating!

    How do I soften hard Rice Krispie Treats?

    A few seconds in the microwave should soften the marshmallow and make your Maple Rice Krispie Treats soft and gooey again!

    Tips & Tricks

    • When using a candy thermometer, make sure the tip is immersed in the mixture, but is not touching the bottom of the pan.
    • Be sure to spray your spatula with nonstick spray before mixing in the cereal. The marshmallow filling will be extra sticky, and this will make it easier to stir.
    • It may be easier to press the maple syrup Rice Krispie Treats into the baking dish with your hands instead of a spatula. If you do this, put a little bit of non-stick spray or oil on your hands to keep the marshmallow from sticking to your hands.

    Related Recipes

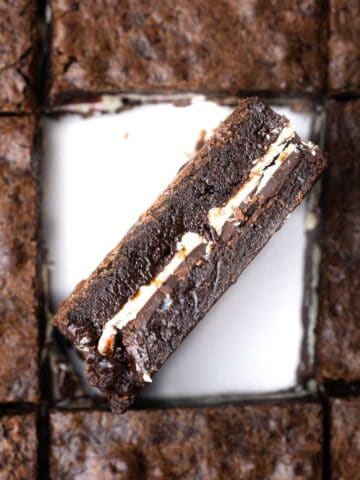
    Nutella Rice Krispie Treats
    Maple Creme Brulee
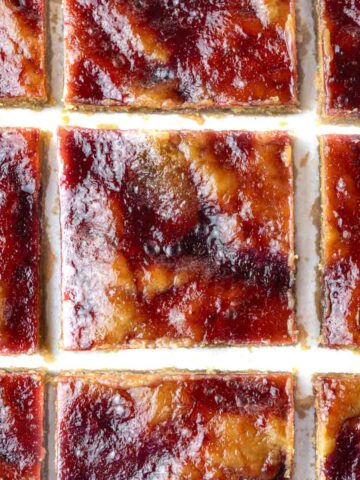
    Salted Caramel Maple Bars
    Cinnamon Toast Crunch Puppy Chow
    St. Patrick's Day Treats
    Fruit Pebbles Treats

    Did you try this recipe?  Review and comment below, and share a photo on Instagram and tag @flourdeliz!

    Pin this recipe for later:

    📖 Recipe

    A stack of 3 maple rice krispie treats on a white marbled surface in front of a grey background and a few more maple rice krispie treats in a single layer
    Print Recipe
    5 from 1 vote

    Maple Rice Krispie Treats

    Gooey maple marshmallow mixed with Rice Krispies cereal and formed into bars for a delicious treat!
    Prep Time30 minutes mins
    Total Time30 minutes mins
    Course: Breakfast, Dessert, Snack
    Cuisine: American
    Servings: 20 bars (depends on how big you cut them!)
    Calories: 153kcal

    Equipment

    • 9x13 baking pan
    • Hand or stand mixer with whisk attachment
    • silicone spatula
    • Saucepan
    • candy thermometer

    Ingredients

    • 3 pkg unflavored gelatin
    • ½ cup water
    • 1 ½ cups sugar
    • ½ cup maple syrup
    • ½ cup corn syrup
    • ½ teaspoon kosher salt Diamond Crystal
    • ½ cup water
    • 9 oz box Rice Krispies

    Instructions

    • Line a 9x13 pan with wax paper, non-stick foil, or partment paper.
    • Put gelatin and first ½ cup water into a mixing bowl and set aside.
    • Heat sugar, maple syrup, corn syrup, salt, and the other ½ cup of water covered over medium high heat for approximately 5 minutes.
    • Uncover and continue heating until the mixture reaches 240 F.
    • Remove from heat.
    • Begin beating the gelatin mixture with the whisk attachment of the mixer, and slowly stream in the syrup mixture.
    • Increase the mixer to high speed (do this slowly to avoid splatter!) and beat an additional 10 minutes.
    • Add in Rice Krispies and mix well.
    • Spread evenly into prepared pan.
    • Let set, then cut into squares.

    Notes

    Be sure to spray your spatula with nonstick spray before mixing in the cereal. The marshmallow filling will be extra sticky, and this will make it easier to stir.
    It may be easier to press the Rice Krispie mixture into the baking dish with your hands instead of a spatula. If you do this, put a little bit of non-stick spray or oil on your hands to keep the marshmallow from sticking to your hands.

    Nutrition

    Calories: 153kcal | Carbohydrates: 38g | Protein: 1g | Fat: 0.3g | Saturated Fat: 0.1g | Polyunsaturated Fat: 0.1g | Monounsaturated Fat: 0.1g | Trans Fat: 0.001g | Sodium: 132mg | Potassium: 34mg | Fiber: 0.1g | Sugar: 28g | Vitamin A: 849IU | Vitamin C: 8mg | Calcium: 11mg | Iron: 4mg

    More Brownies + Bars

    • A close-up side view of a peanut butter marshmallow square with more bars surrounding it.
      Peanut Butter Marshmallow Squares
    • A top down view of a batch of peanut butter and jelly bars sliced into 9 squares and each just slightly separated from each other with the squares around the edges going out of frame.
      Peanut Butter and Jelly Bars
    • A stack of three Biscoff blondies with additional blondies next to and behind the stack.
      Biscoff Blondies
    • A close-up top down view of a peppermint mocha brownie on its side showing the middle peppermint bark layer surrounded by the rest of the batch of brownies.
      The Fudgiest Peppermint Mocha Brownies
    • Facebook
    • Threads
    • Bluesky
    • SMS
    • Email

    Reader Interactions

    Comments

      5 from 1 vote (1 rating without comment)

      Did you make this recipe? Let me know what you think! Cancel reply

      Your email address will not be published. Required fields are marked *

      Recipe Rating


      This site uses Akismet to reduce spam. Learn how your comment data is processed.

    1. Lisa Sugarman says

      March 03, 2017 at 8:20 pm

      These are the money! Way too good to have around the house often. Because they'd never last.

      Reply
      • Liz says

        March 05, 2017 at 12:09 pm

        They certainly didn't last in my house!

        Reply

    Primary Sidebar

    Here you'll find a fun and welcoming baking space without any judgement. Whether you're new to baking, or have just a few minutes or a tiny kitchen, these recipes are designed to be simple and approachable!

    A headshot of Liz holding Gizmo, a small Yorkie with his tongue out.

    Hi, I'm Liz!

    I started creating my own recipes when I realized that baking blogs usually shared complicated and time-consuming recipes that needed a lot of kitchen equipment and a lot of ingredients. When my grandma mentioned that I should write a cookbook, that inspired me to turn my super simple recipes into a blog. As much as I love to make these super simple recipes for my friends and family, I also love being able to share them with you!

    Learn more about me!

    Trending Recipes

    • The bottom left corner of a 9x13 baking dish of peach cobbler with a serving spoon with a green handle sticking out of the dish.
      Peach Cobbler with Cake Mix
    • angled view of cookie cake with alternating brown and white frosting dots around the outside, and one slice pulled out part-way and angled. Multi-colored sprinkles are on the cookie as well as the marbled surface the cookie is on.
      Chocolate Chip Cookie Cake
    • Close up of two oat flour macarons stacked with another on its side next to the stack.
      Nut-Free Macarons Using Oat Flour
    • A bowl of Nutella Whipped Cream in a small white bowl on a brown cutting board.
      Two Ingredient Nutella Whipped Cream
    • A sliced batch of red velvet brownies with the center brownie sideways to show the inside.
      Simple 3 Ingredient Red Velvet Brownies using Cake Mix
    • A peach cupcake in the center of the frame with other peach cupcakes around it, all barely in frame.
      Peach Cupcakes with Canned Peaches

    Summer Recipes

    • A single piña colada cupcake topped with buttercream frosting and a maraschino cherry on a white surface.
      Piña Colada Cupcakes
    • A stack of 4 Fruity Pebbles Bars each separated by a square of parchment paper.
      Fruity Pebbles Treats
    • A hand holding the red handle of an ice cream scooper with a scoop of Nutella ice cream in the scooper.
      3-Ingredient No-Churn Nutella Ice Cream
    • A hand holding a cake server lifting a slice up over the rest of the cake.
      Easy Strawberry Cake with Strawberry Filling
    • A batch of blueberry cookies on a round white plate placed on top of a blue napkin to the bottom right of the plate going out of frame.
      Blueberry Cookies
    • An ice cream cone with a scoop of corn ice cream upside down on a white surface with corn cobs in the background.
      3-Ingredient Sweet Corn Ice Cream {No-Churn}

    See more Summer Recipes →

    Footer

    ↑ back to top

    About

    • About Liz
    • Privacy Policy
    • Terms of Use
    • Accessibility Policy

    Newsletter

    • Subscribe to my monthly newsletter

    Let's Connect!

    • Work with me
    • Contact me

    Copyright © 2016-2025 Flour de Liz, LLC

    Rate This Recipe

    Your vote:


    A rating is required
    A name is required
    An email is required

    Recipe Ratings without Comment

    Something went wrong. Please try again.