menu icon
go to homepage
  • Recipes
  • About Liz
  • Christmas
  • Subscribe
  • Let's Work Together!
    • Email
    • Facebook
    • Instagram
    • Pinterest
    • Twitter
  • subscribe
    search icon
    Homepage link
    • Recipes
    • About Liz
    • Christmas
    • Subscribe
    • Let's Work Together!
    • Email
    • Facebook
    • Instagram
    • Pinterest
    • Twitter
  • ×
    Flour de Liz » Recipes » Brownie + Bar Recipes

    Peanut Butter and Jelly Bars

    Published: Oct 21, 2024 by Liz Pollio · This post may contain affiliate links · Leave a Comment

    • Facebook
    • Threads
    • Bluesky
    • SMS
    • Email
    Jump to Recipe Print Recipe
    A pin for Pinterest of an angled view of a peanut butter and jelly bar surrounded by additional bars blurred and going out of frame.

    Peanut butter and jelly sandwiches are the ultimate nostalgia. These Peanut Butter and Jelly Bars take this classic childhood lunch to the next level. They're a sweet and salty dessert with the best texture and will take you back to those elementary school days - but you're an adult now so you can make it a dessert and have as many as you want! Plus, they're so easy to make, the kids can help - no mixer needed!

    A top down view of a batch of peanut butter and jelly bars sliced into 9 squares and each just slightly separated from each other with the squares around the edges going out of frame.

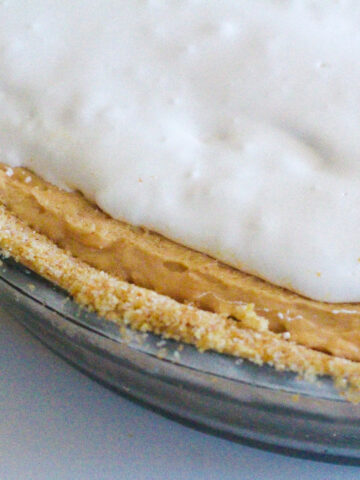
    This super simple one-bowl recipe is great for lunch boxes, bake sales, potlucks, and fun after school treats! They even make a fun and delicious breakfast! If you love peanut butter, check out these Peanut Butter Cups and this Fluffernutter Pie.

    Jump to:
    • Why this Recipe Works
    • Ingredients and Notes
    • Substitutions and Variations
    • How to Make this Recipe
    • Recipe FAQs
    • Tips & Tricks
    • Storage Tips
    • Related Recipes
    • 📖 Recipe
    • 💬 Comments

    Why this Recipe Works

    Many recipes for Peanut Butter and Jelly Bars create dry and crumbly bars that are peanut butter heavy with just a hint of jelly. I prefer my PB&Js to be more of a 50/50 split so every time I tested these buttery bars, I added more jelly until I got them exactly right. These nostalgic treats are soft and sweet with the perfect balance of peanut butter to jelly! Plus, they're so quick and easy to make and use mainly pantry staples so you can enjoy these all the time!

    Ingredients and Notes

    Ingredients needed to make peanut butter and jelly bars.

    Butter and Oil - The butter is melted to provide both moisture and richness to the batter, and we add a bit of oil for additional moisture and fat.

    Brown Sugar - Brown sugar has more moisture than white granulated sugar and its caramelized flavor adds a delicious flavor profile to these Peanut Butter and Jelly Bars.

    Peanut Butter - I used shelf-stable, spreadable creamy peanut butter like Jif or Skippy. I have not tested this recipe with a natural peanut butter or a crunchy peanut butter, but it will likely impact the texture of these soft dessert bars.

    Jelly - I used strawberry jelly when testing this recipe, but grape or raspberry or blackberry, or really any flavor would also be delicious. Use your favorite fruit jam or jelly for PB&Js!

    Substitutions and Variations

    Peanut Butter - These Peanut Butter and Jelly Bars can use a similarly textured almond butter or sunflower butter if you want to make these peanut-free or fully nut-free. For a cookie butter substitution, try these Cookie Butter Blondies.

    Toppings - For some added texture and flavor, you could add some crushed peanuts or other nuts on top. Granola or oats could also add some good texture to these quick and easy bars! They would also be delicious topped with a scoop of vanilla ice cream.

    How to Make this Recipe

    Oil, melted butter, and brown sugar in a clear glass mixing bowl on a white surface.

    Step 1: Combine butter, oil, and brown sugar.

    An egg and peanut butter added to the butter and oil mixture in the clear glass mixing bowl.

    Step 2: Add egg and peanut butter and mix until cohesive and fully combined.

    Flour on top of the peanut butter mixture in a clear glass mixing bowl.

    Step 3: Add in flour, baking soda, and salt and mix until just combined.

    Half of peanut butter dough pressed into a parchment lined 8x8 pan.

    Step 4: Press half of the peanut butter dough into the bottom of a lined 8x8 pan.

    Dollops of peanut butter dough crumbled over a layer of jelly in a parchment lined 8x8 pan.

    Step 5: Top the dough with ½ cup of jelly and spread evenly overtop of the dough then crumble the remaining dough over the jelly layer.

    A layer of peanut butter dough with jelly from the lower layer seeping through in a parchment lined 8x8 pan.

    Step 6: Gently press to distribute overtop of the jelly as evenly as possible.

    Jelly spread overtop peanut butter dough in a parchment lined 8x8 pan.

    Step 7: Spread the final ½ cup of jelly overtop and bake at 375°F for 20 minutes.

    A batch of peanut butter and jelly bars on a white surface cut into 9 squares.

    Step 8: Cool completely, cut into squares, and enjoy!

    Recipe FAQs

    How do you serve Peanut Butter and Jelly bars?

    I enjoy these straight out of the pan, but they'd also be delicious with a cold glass of milk or a scoop of vanilla ice cream. They make a great afternoon snack and the best breakfast!

    What type of jam or jelly works best?

    It will be ideal to use a thicker jam or jelly. The one I used came out in blobs and then I had to press it around to spread it. It didn't necessarily spread easily. This will come out better than using a wet, runny jelly.

    Can I add extra ingredients like nuts or chocolate chips?

    Yes! You can add nuts, chocolate chips, oats, granola, or anything that excites you as a topping. Just keep an eye on it while the bars are baking as some toppings could burn.

    An angled view of a peanut butter and jelly bar surrounded by additional bars blurred and going out of frame.

    Tips & Tricks

    Tip #1: When stirring in the peanut butter, it will be thick and will seem like it won't combine, but it eventually will. Just keep stirring!

    Tip #2: This easy Peanut Butter and Jelly Bars recipe can be doubled and made in a 9x13 pan.

    Storage Tips

    • Peanut Butter and Jelly Bars can be stored in an airtight container at room temperature for about 3 days.
    • They can be stored in an airtight container in the refrigerator for up to a week.
    • If wrapped well in plastic wrap, and then in foil, and placed in a freezer-safe zip-top bag, Peanut Butter and Jelly Bars should last 2-3 months in the freezer. Be sure to let sit out at room temperature for at least 30 an hour before enjoying!

    Related Recipes

    • Close up of the layers of a fluffernutter pie - bread crumb crust, peanut butter pie filling, marshmallow fluff topping
      Fluffernutter Pie
    • A stack of three Biscoff blondies with additional blondies next to and behind the stack.
      Biscoff Blondies
    • Two layers of raspberry cake going out of frame to the right with raspberry icing between the layers and on top and a small pile of raspberries on top.
      Raspberry Cake with Raspberry Filling
    • side view of the inside of a sangria poptart that has been broken in half and the two halves are stacked on top of eachother with the filling facing out. inthe background are whole sangria poptarts.
      Sangria Poptarts

    Did you try this recipe?  Leave a review below, and tag @flourdeliz on Instagram!

    📖 Recipe

    A top down view of a batch of peanut butter and jelly bars sliced into 9 squares and each just slightly separated from each other with the squares around the edges going out of frame.

    Peanut Butter and Jelly Bars

    Liz Pollio
    Peanut butter blondie bars filled and topped with your favorite jam or jelly!
    5 from 1 vote
    Print Recipe Pin Recipe
    Prep Time 10 minutes mins
    Cook Time 20 minutes mins
    Total Time 30 minutes mins
    Course Dessert
    Cuisine American
    Servings 16 bars
    Calories 270 kcal

    Equipment

    • 8x8 pan
    • Mixing bowl

    Ingredients


    • ½ stick butter melted and cooled slightly
    • ¼ cup oil neutral, such as vegetable or canola
    • ½ cup brown sugar
    • 1 egg
    • 1 cup peanut butter
    • 1 cup flour
    • ¼ teaspoon baking soda
    • ½ teaspoon kosher salt
    • 1 cup jelly

    Instructions
     

    • Line an 8x8 pan with parchment paper and preheat oven to 375℉.
    • Combine butter, oil, and brown sugar.
    • Add egg and peanut butter and mix until fully combined and cohesive.
    • Add flour, baking soda, and salt, and mix until just combined.
    • Press half of the peanut butter dough evenly into the lined pan, about 300-315 grams of dough.
    • Spread half a cup of the jelly overtop of the dough in the pan.
    • Crumble the remaining dough on top of the jelly and gently press to cover as much of the jelly layer as possible.
    • Spread the remaining ½ cup of jelly on top.
    • Bake for 20 minutes.
    • Cool completely, cut into squares, and enjoy!

    Notes

    The peanut butter will mix in to the batter. Just keep stirring and it will become cohesive!
    This recipe can be doubled and baked in a 9x13 pan. 

    Nutrition

    Calories: 270kcalCarbohydrates: 31gProtein: 5gFat: 15gSaturated Fat: 4gPolyunsaturated Fat: 3gMonounsaturated Fat: 7gTrans Fat: 0.1gCholesterol: 18mgSodium: 194mgPotassium: 129mgFiber: 1gSugar: 19gVitamin A: 103IUVitamin C: 2mgCalcium: 21mgIron: 1mg

    Nutrition information is automatically calculated so should only be used as an estimate. Accuracy is not guaranteed.

    Tried this recipe?Let us know how it was!

    More Dessert Bars

    • A close-up side view of a peanut butter marshmallow square with more bars surrounding it.
      Peanut Butter Marshmallow Squares
    • A close-up top down view of a peppermint mocha brownie on its side showing the middle peppermint bark layer surrounded by the rest of the batch of brownies.
      The Fudgiest Peppermint Mocha Brownies
    • A straight-on side view of a stack of three lucky charms treats.
      Lucky Charms Treats
    • Stack of four Chocolate Thin Mint Brownies with additional brownies blurred in the background.
      Chocolate Thin Mint Brownies
    • Facebook
    • Threads
    • Bluesky
    • SMS
    • Email

    Comments

    No Comments

    5 from 1 vote (1 rating without comment)

    Did you make this recipe? Let me know what you think! Cancel reply

    Your email address will not be published. Required fields are marked *

    Recipe Rating


    This site uses Akismet to reduce spam. Learn how your comment data is processed.

    Here you'll find a fun and welcoming baking space without any judgement. Whether you're new to baking, or have just a few minutes or a tiny kitchen, these recipes are designed to be simple and approachable!

    Liz wearing a pink apron leaning on a counter with her chin on her palm.

    Hi, I'm Liz!

    I started creating my own recipes when I realized that baking blogs usually shared complicated and time-consuming recipes that needed a lot of kitchen equipment and a lot of ingredients. When my grandma mentioned that I should write a cookbook, that inspired me to turn my super simple recipes into a blog. As much as I love to make these super simple recipes for my friends and family, I also love being able to share them with you!

    Learn more about me!

    Easy Christmas Dessert Recipes!

    • A batch of red velvet cookies on a gold wire rack.
      Red Velvet Cake Mix Cookies
    • A chocolate orange cupcake in a paper liner with others blurred and going out of frame in the background and a spiral of orange peel coming out of the frosting.
      Chocolate Orange Cupcakes
    • A white plate of chocolate peppermint cookies with a red linen in the background and crust peppermint surrounding the scene.
      Fudgy Chocolate Peppermint Cookies
    • A close-up top down view of a peppermint mocha brownie on its side showing the middle peppermint bark layer surrounded by the rest of the batch of brownies.
      The Fudgiest Peppermint Mocha Brownies
    • A slice of hot chocolate pie on a pie server above half a hot chocolate pie.
      Hot Chocolate Pie
    • A close-up side view of a peanut butter marshmallow square with more bars surrounding it.
      Peanut Butter Marshmallow Squares

    See more Christmas Recipes →

    Trending Recipes

    • The bottom left corner of a 9x13 baking dish of peach cobbler with a serving spoon with a green handle sticking out of the dish.
      Peach Cobbler with Cake Mix
    • Close up of two oat flour macarons stacked with another on its side next to the stack.
      Nut-Free Macarons Using Oat Flour
    • angled view of cookie cake with alternating brown and white frosting dots around the outside, and one slice pulled out part-way and angled. Multi-colored sprinkles are on the cookie as well as the marbled surface the cookie is on.
      Chocolate Chip Cookie Cake
    • A sliced batch of red velvet brownies with the center brownie sideways to show the inside.
      Simple 3 Ingredient Red Velvet Brownies using Cake Mix
    • A bowl of Nutella Whipped Cream in a small white bowl on a brown cutting board.
      Two Ingredient Nutella Whipped Cream
    • A hand holding a slice of sweet potato pie on a pie server over the rest of the pie.
      Sweet Potato Pie with Graham Cracker Crust

    Footer

    ↑ back to top

    About

    • About Liz
    • Privacy Policy
    • Terms of Use
    • Accessibility Policy

    Newsletter

    • Subscribe to my monthly newsletter

    Let's Connect!

    • Work with me
    • Contact me

    Copyright © 2016-2025 Flour de Liz, LLC

    Rate This Recipe

    Your vote:


    A rating is required
    A name is required
    An email is required

    Recipe Ratings without Comment

    Something went wrong. Please try again.