
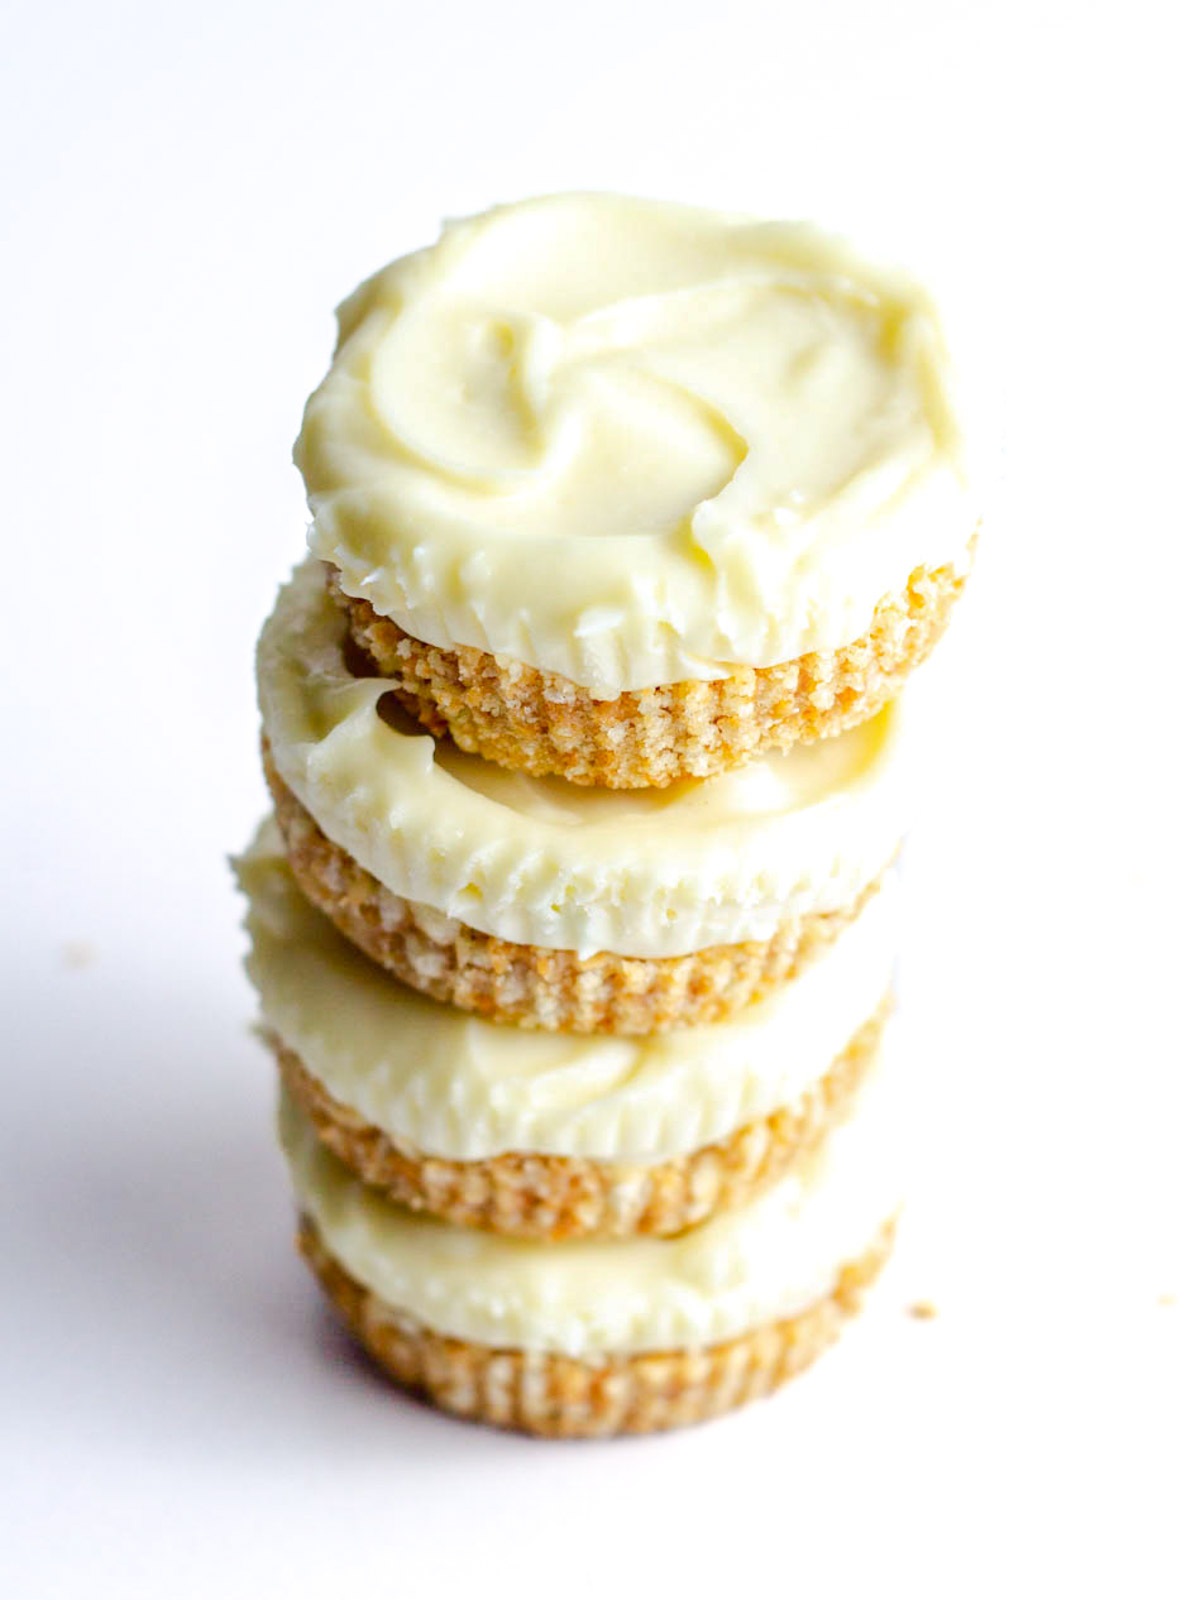
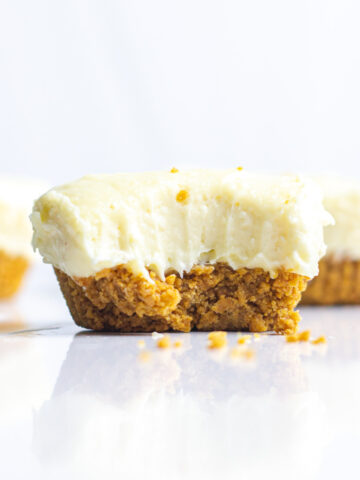
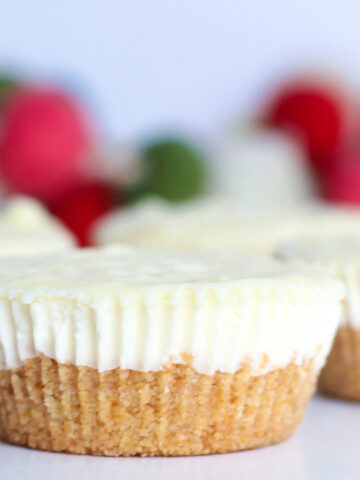
My wine of choice will always be something sparkling. I often go for prosecco because I love that it's light and crisp, and not too dry or too sweet. That makes it such a perfect simple flavor to bake with and these easy homemade No-Bake Prosecco Cheesecakes are the perfect example.
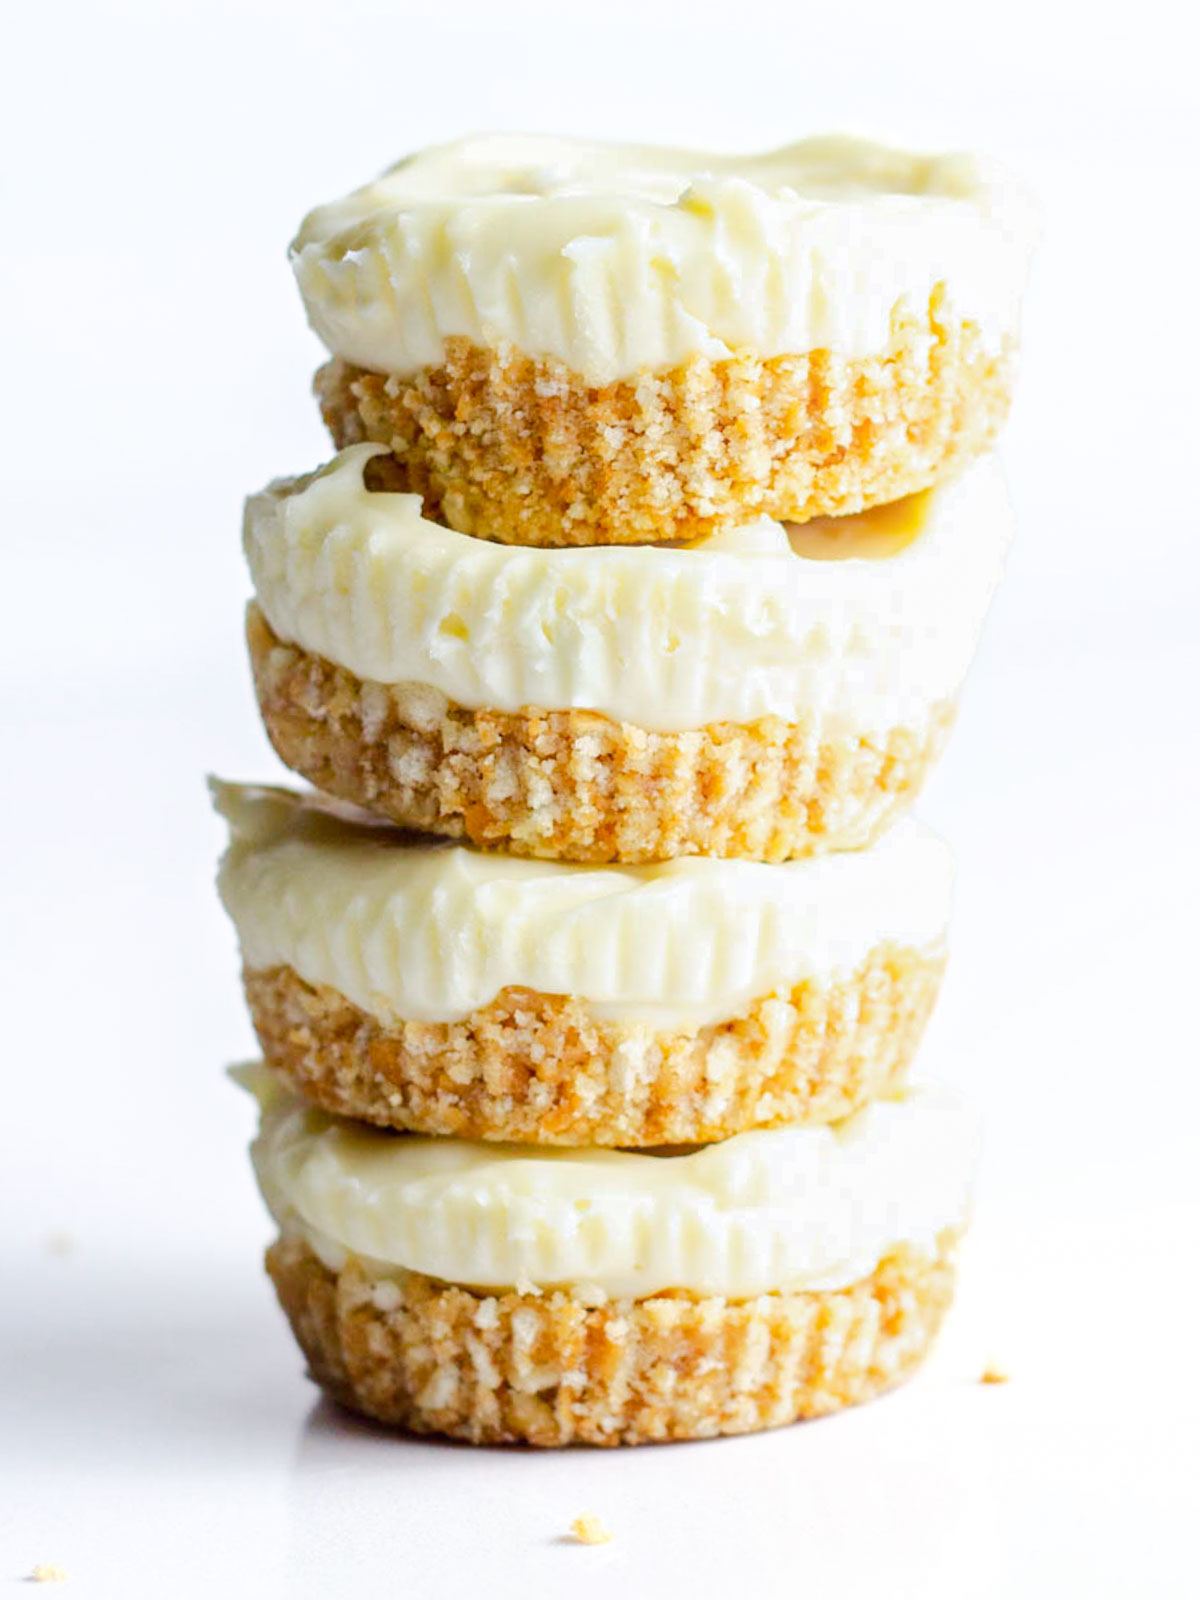
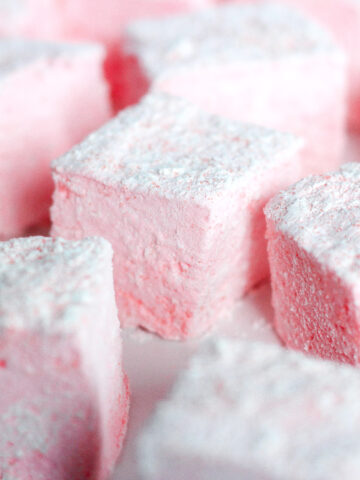
This no-bake prosecco cheesecake recipe is perfect for any celebration or holiday, especially Christmas and New Year's Eve. If you're popping a bottle of bubbly, you'll also love Strawberries & Champagne Marshmallows or Strawberries & Champagne Cupcakes with Nutella Frosting.
Why this Recipe Works
You don't need a special occasion to enjoy champagne or prosecco. The light crispness of the wine perfectly balances with the richness of the cream cheese and the sweetness of the cheesecake.
Ingredients and Notes
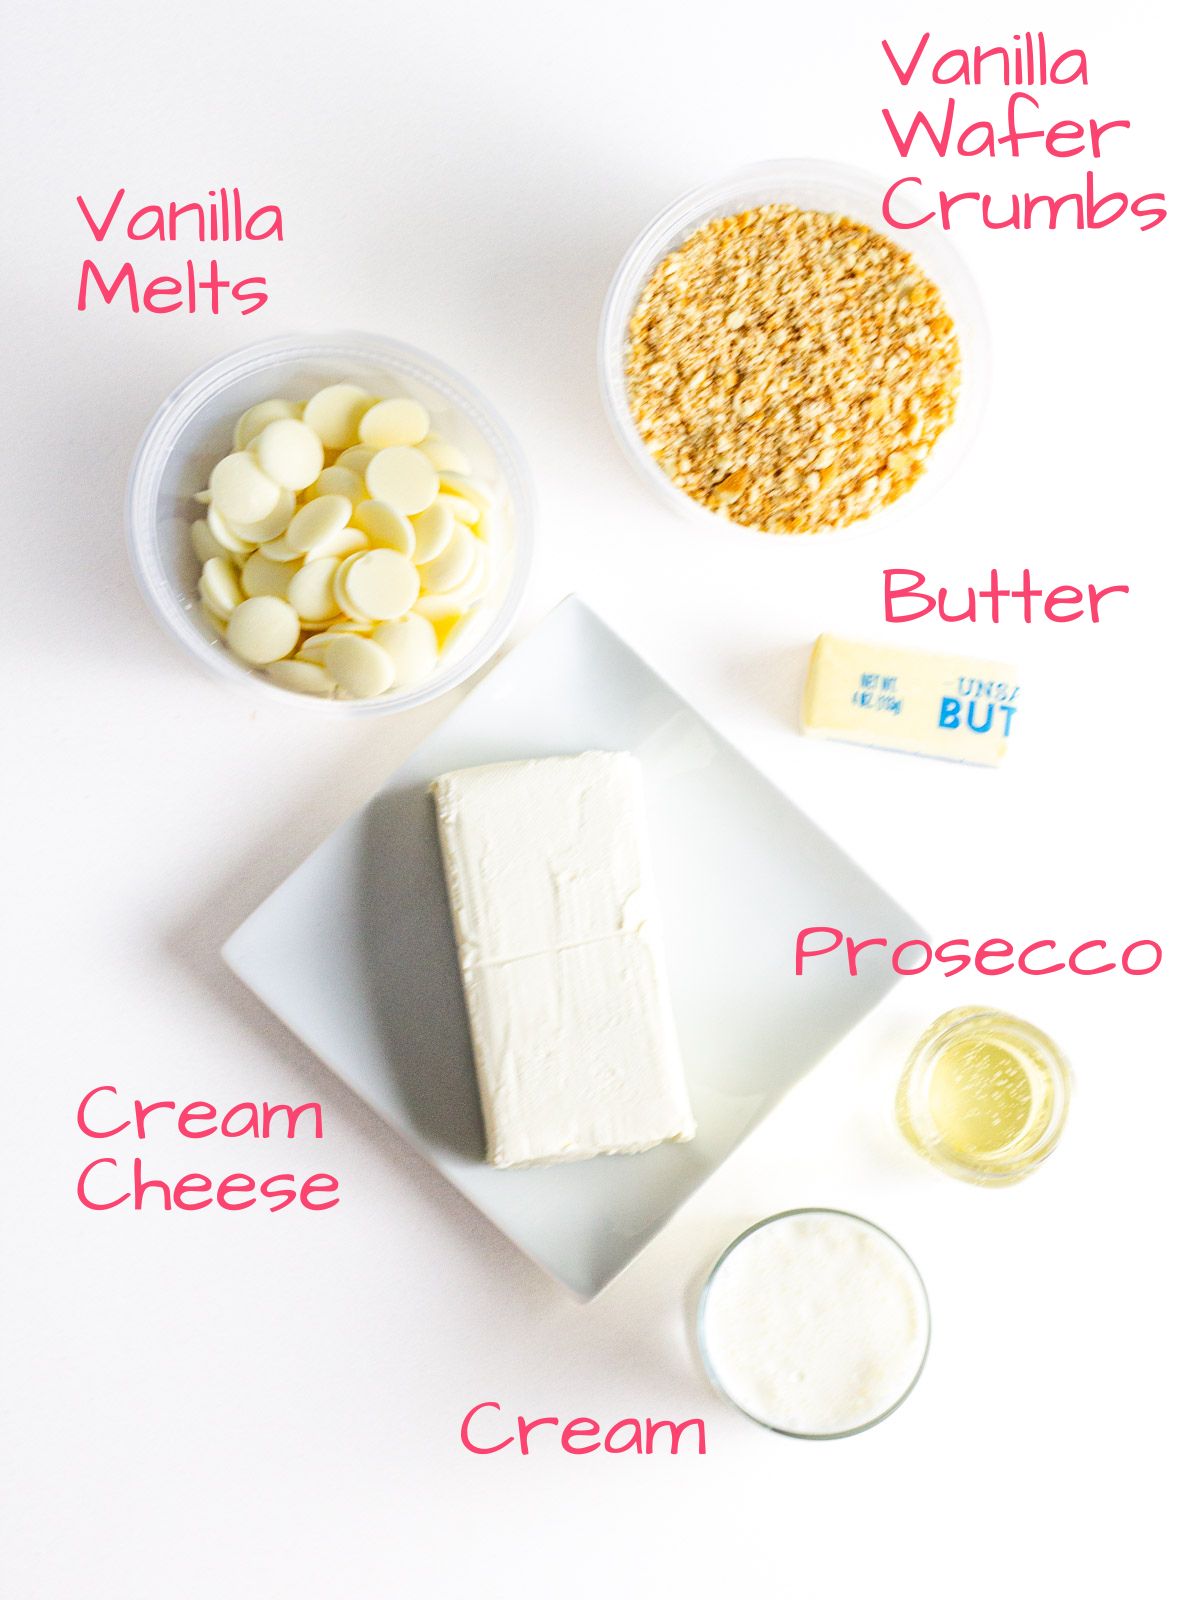
Melted Butter - Melted butter holds the cookie crumbs together to form the crumb crust for these mini cheesecakes.
Vanilla Melts - Candy melts give structure to the homemade cheesecake filling. They're melted down and mixed into the liquid filling ingredients, and then as they cool they help the filling hold it's shape.
Cream Cheese - Cream cheese gives cheesecake both texture and flavor, making this a rich and delicious treat. Have an extra block of cream cheese? Try these Pumpkin Cheesecake Cookies!
Substitutions
Vanilla Wafers - Any cookie with a subtle flavor works great for this easy recipe. Flavored cookies will overpower the flavor of the prosecco, but Golden Oreos, shortbread cookies, or even basic graham crackers will work.
Vanilla Melts - White chocolate will work in place of vanilla melts in this simple homemade recipe. It will alter the flavor slightly, but will still taste great!
Prosecco - Any sparkling wine will work great for this no-bake cheesecake recipe. Champagne is a great substitute, or even a sparkling rosè. You could also use sparkling grape juice or another non-alcoholic substitution.
How to make this recipe
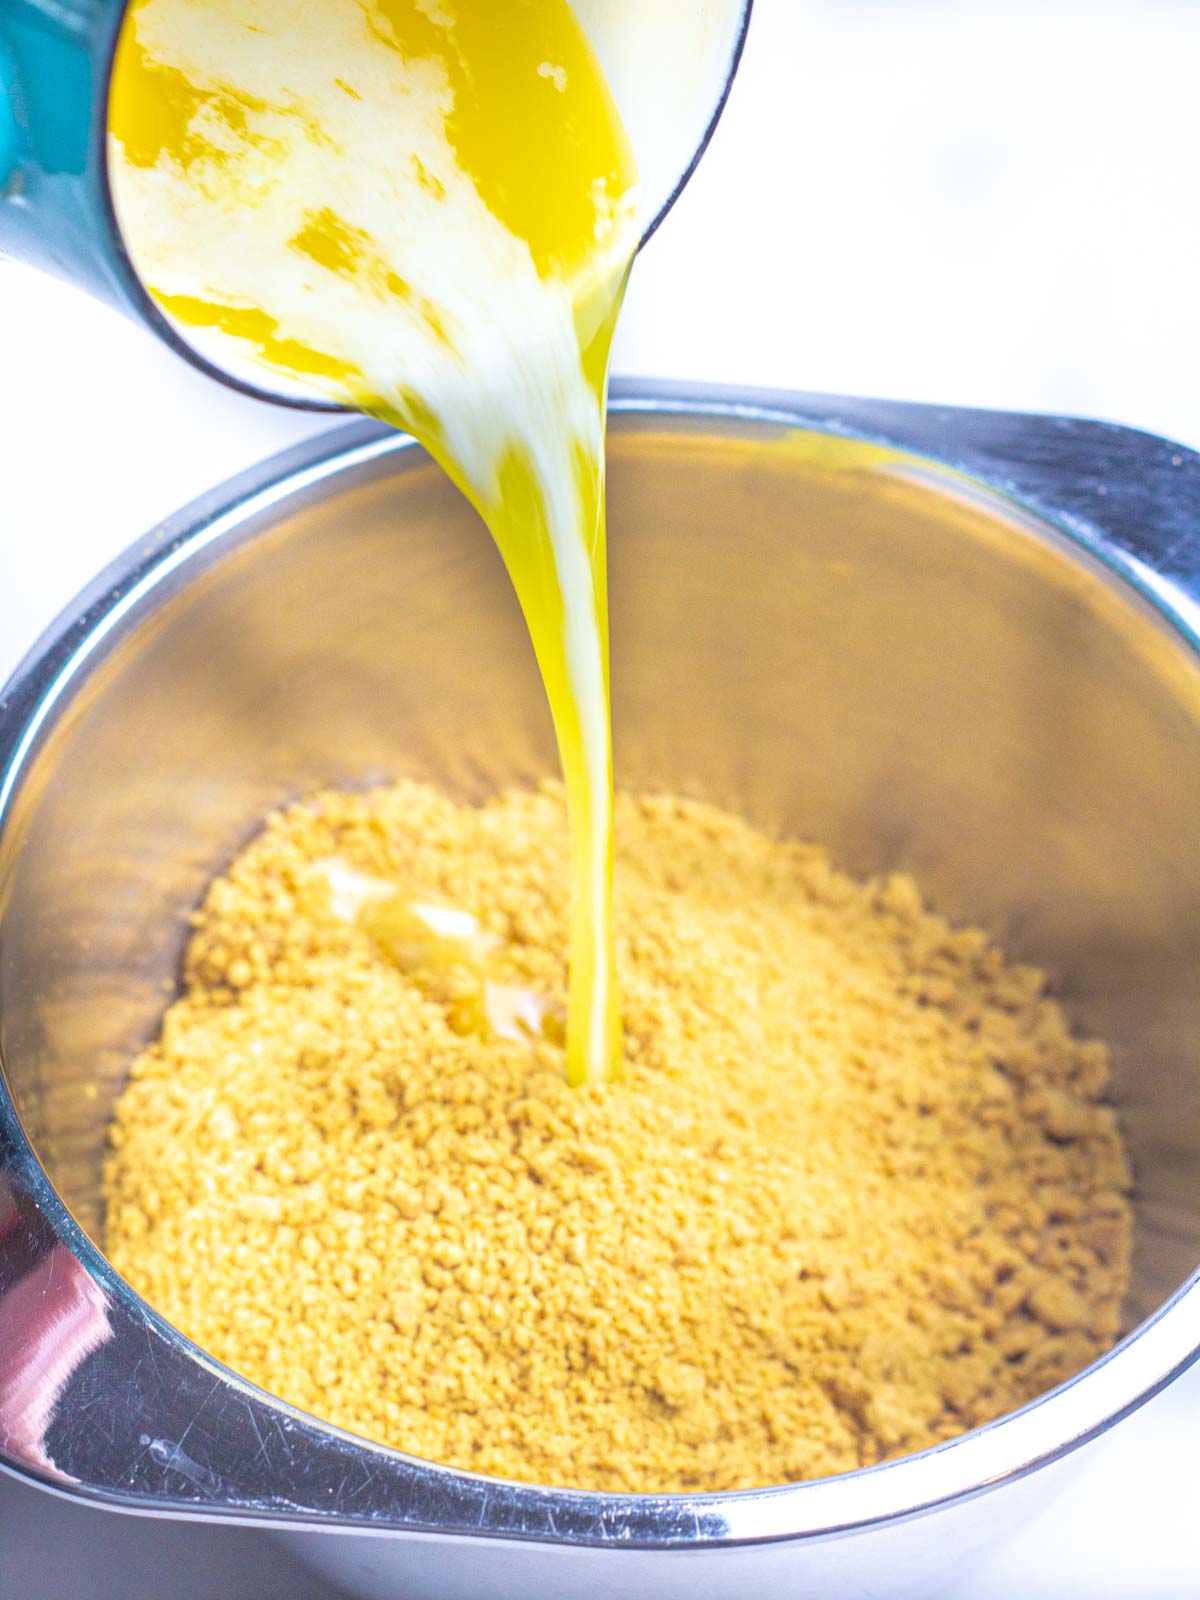
Step 1: Spray muffin tin with non-stick spray or line with cupcake wrappers. Combine crumbs with melted butter until all crumbs are moistened.
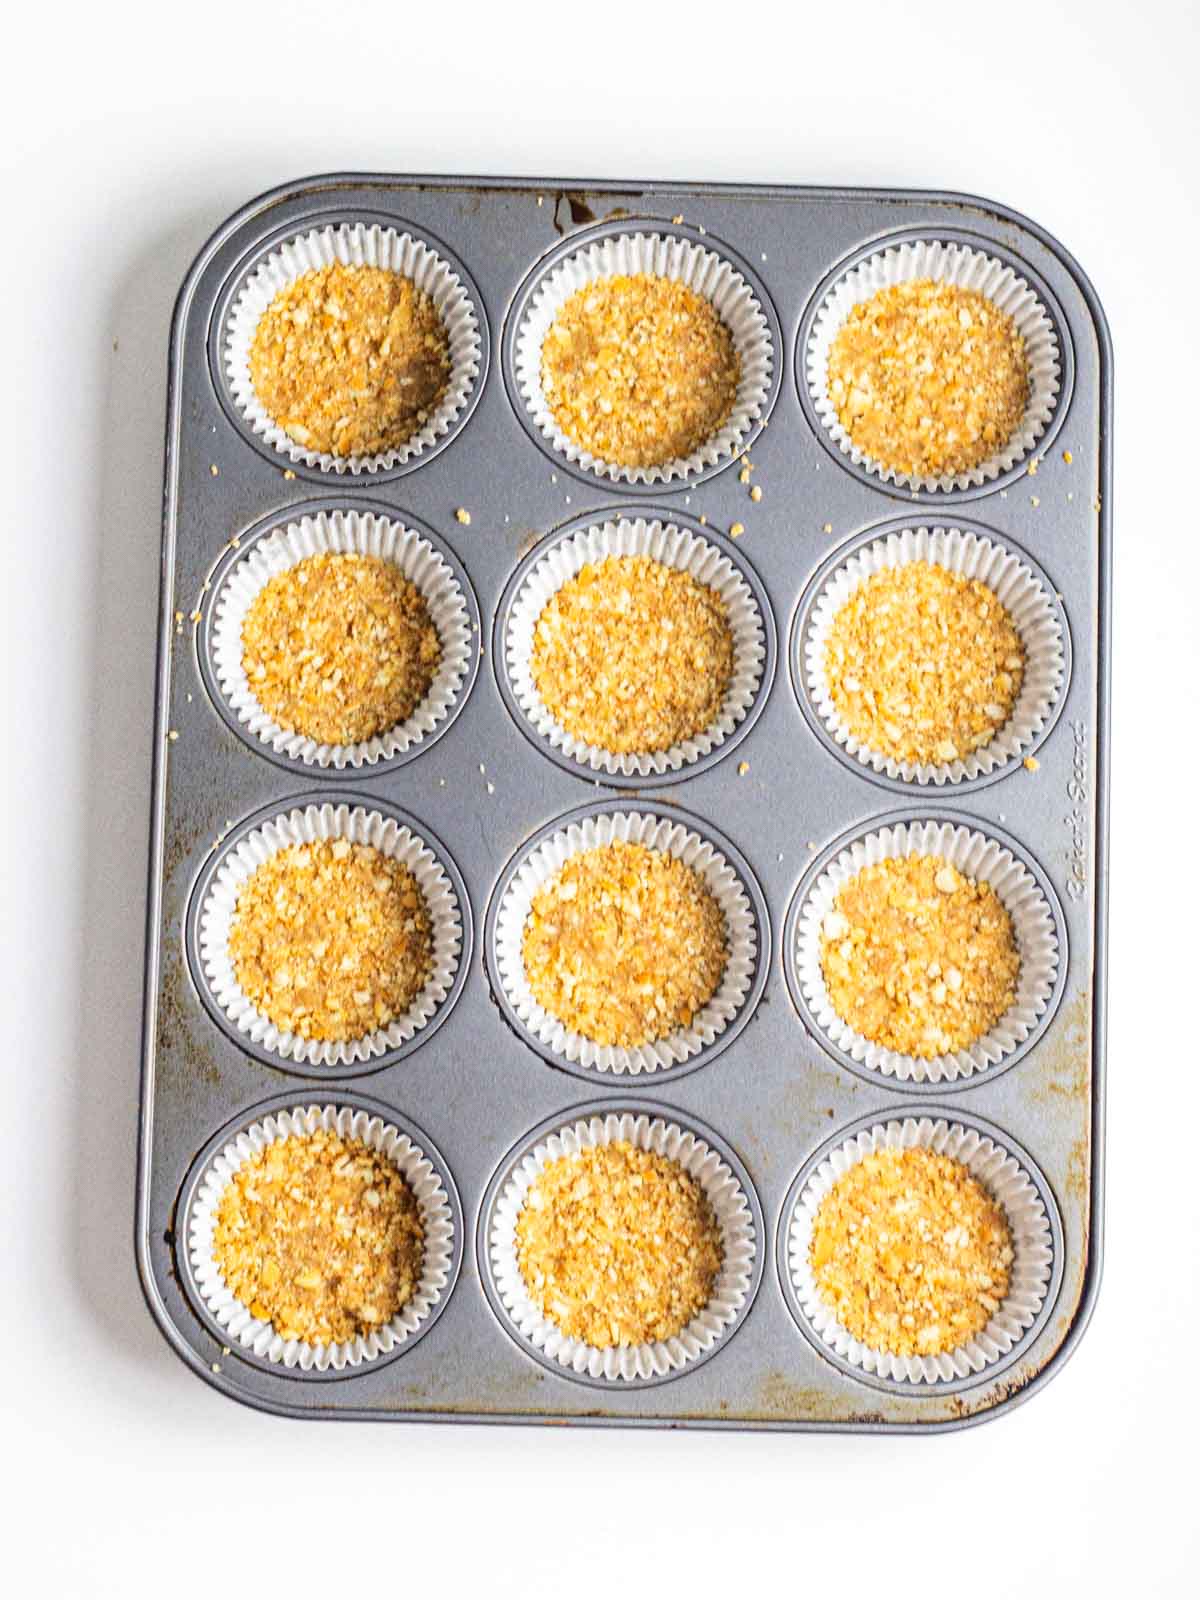
Step 2: Press crumb mixture into the bottoms of each muffin cup. Freeze for about 1 hour.

Step 3: In a double boiler combine vanilla melts, cream, and prosecco, and combine till melted and smooth.
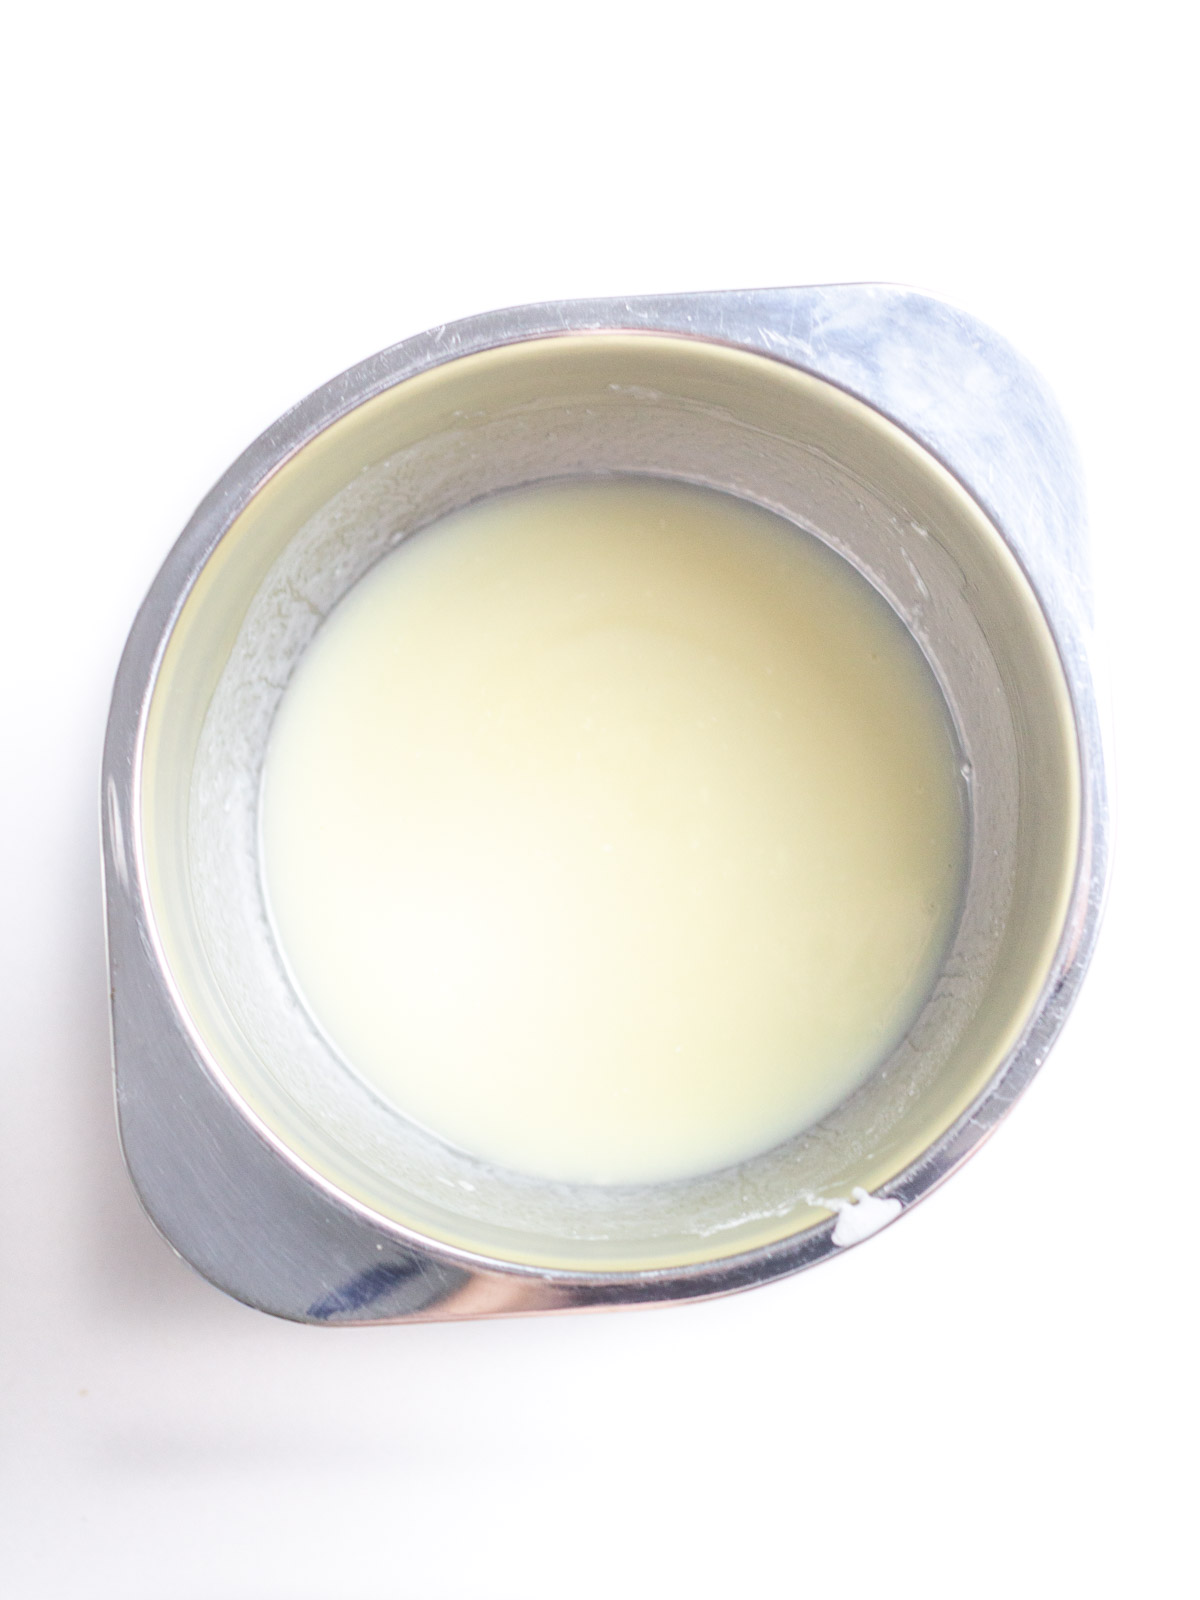
Step 4: Remove from heat and cool for about 15-20 minutes.
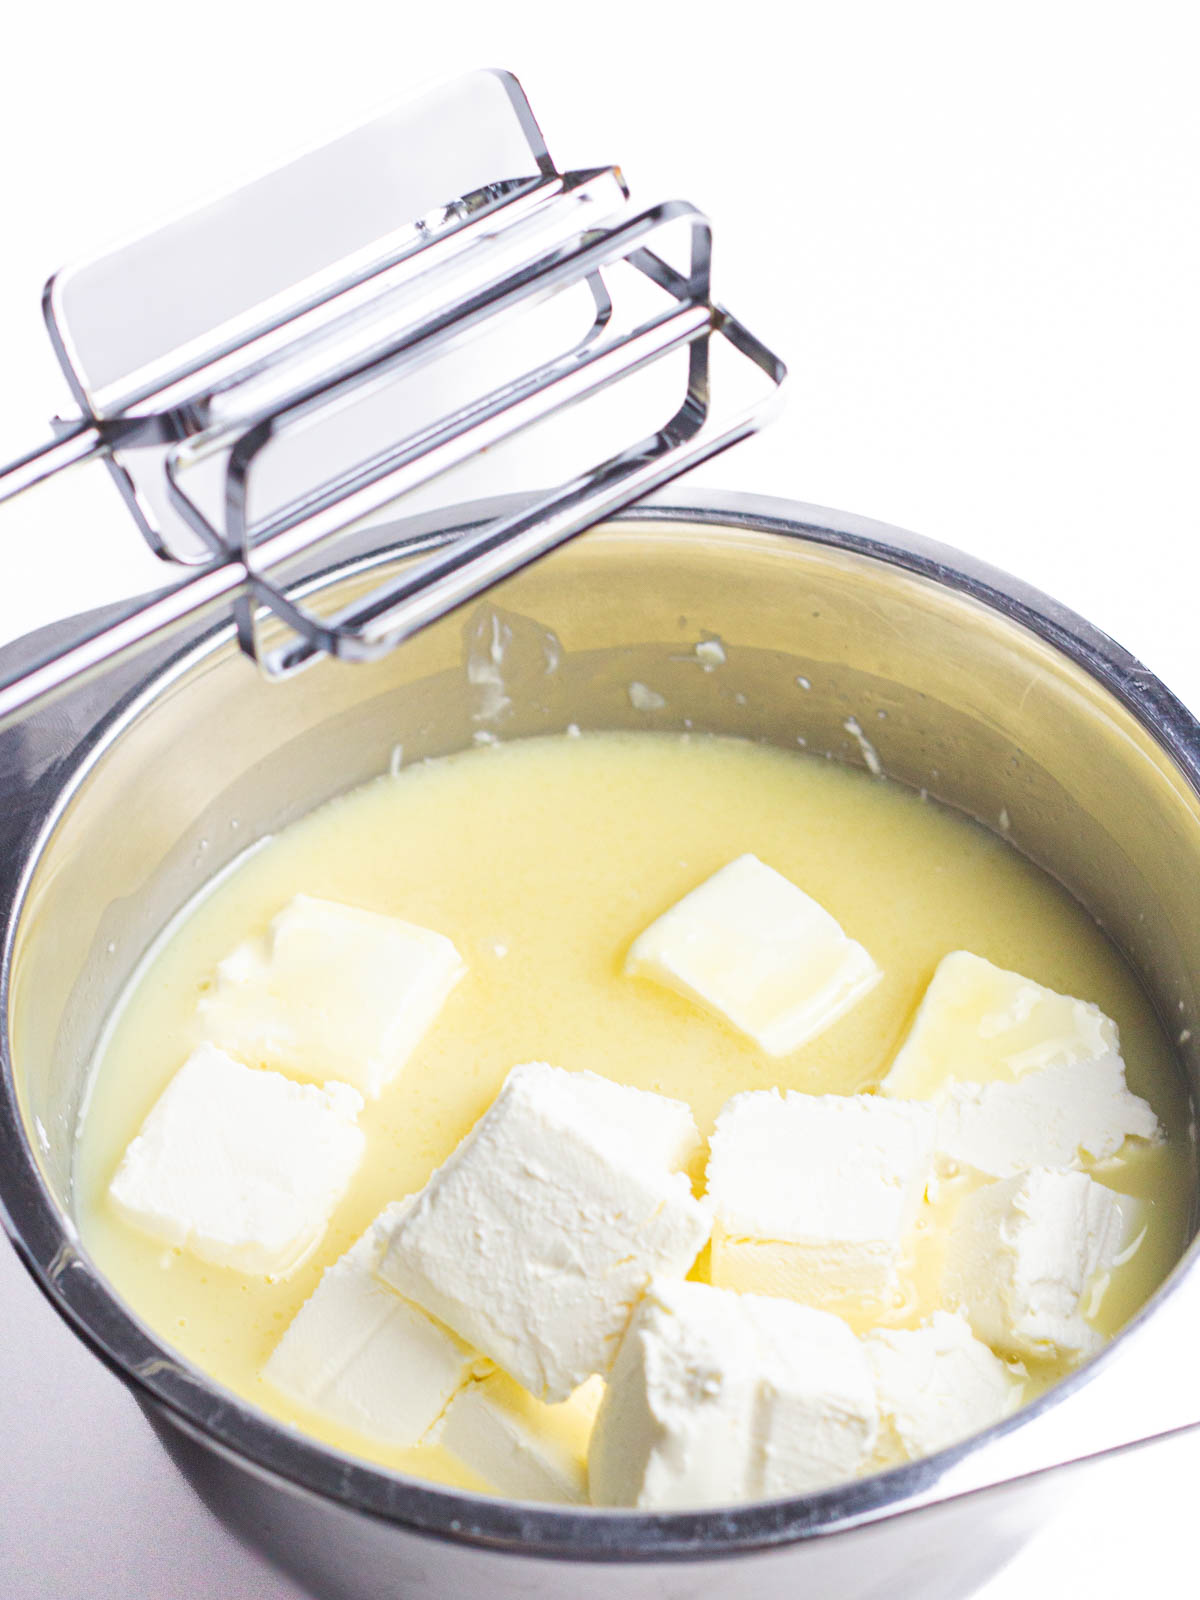
Step 5: Beat in cream cheese till smooth and combined.
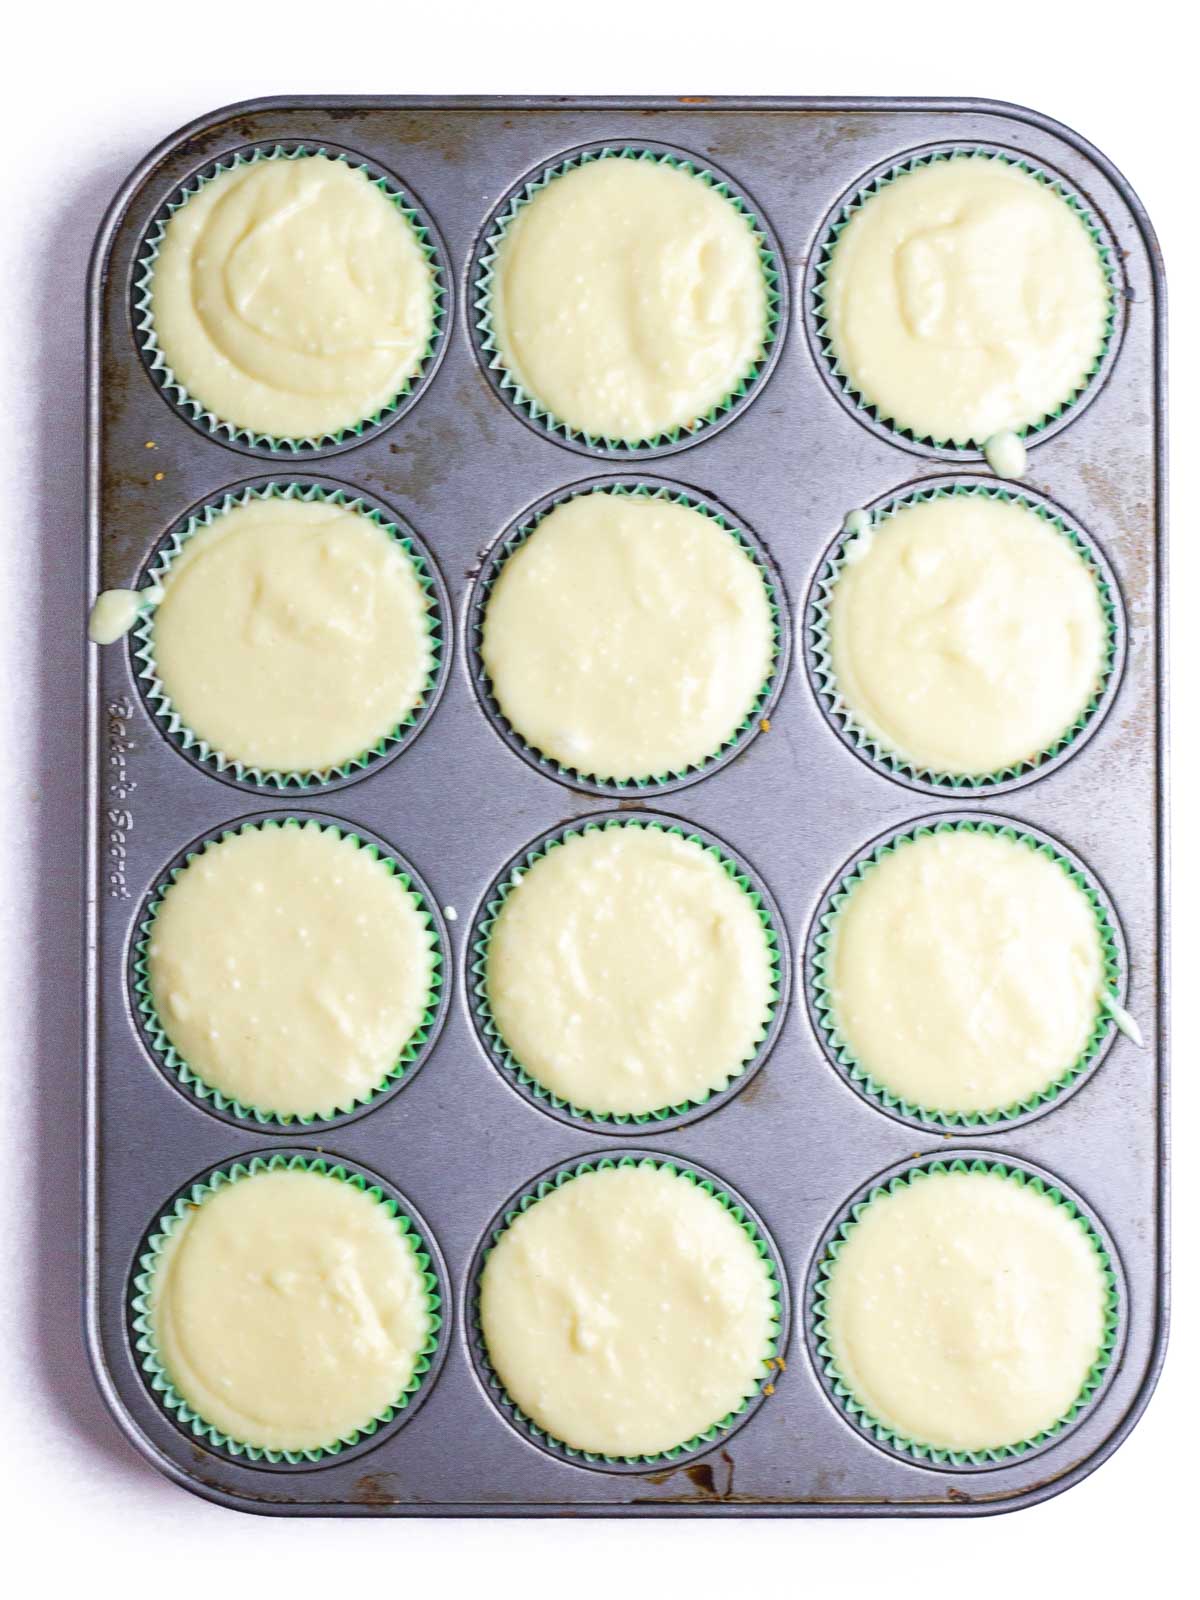
Step 6: Pour or spoon some filling onto the top of each crust, filling most of the way to the top. Chill until set, at least 1 hour, and enjoy!
Recipe FAQs
Traditional no-bake cheesecake is generally lighter than baked cheesecake, however the super simple process this no-bake recipe uses will result in a slightly denser cheesecake but no water bath is needed which keeps it extra easy!
I highly recommend using paper liners for these homemade mini cheesecakes. It's so easy to pinch the edge of the paper liner and pull it right out, or slide a fork or butter knife between the paper liner and tin to pull it out.
If you grease the tin instead of using paper liners, run a knife or narrow spatula around the edge of each cheesecake, they should easily slide out.
Tips & Tricks
Tip #1: Instead of freezing the crumb crust, you can bake it for 5-7 minutes at 350° F. Be sure it cools completely before adding the prosecco cheesecake filling.
Tip #2: When measuring the prosecco, let the bubbles settle. You won't have enough prosecco if you include the bubbles in your measurement.
Tip #3: The cream cheese will blend in more smoothly if it's room temperature and cut into smaller pieces. Letting the cream cheese sit out while preparing the recipe will let it warm up.
Storage Tips
No-bake Prosecco Cheesecakes should be stored in the refrigerator and will last about 3-5 days.
Related Recipes
Did you try this recipe? Leave a review below, and tag @flourdeliz on Instagram!
📖 Recipe

No-Bake Prosecco Cheesecake
Equipment
- cupcake pan
- double boiler
- Mixing bowl
Ingredients
Crust
- 1 ½ cups vanilla wafer crumbs
- ½ stick butter melted
Cheesecake
- 6 oz vanilla melts
- ¼ cup cream
- ⅓ cup prosecco
- 8 oz cream cheese
Instructions
- Spray muffin tin with non-stick spray or line with cupcake wrappers.
- Combine crumbs with melted butter until all crumbs are moistened.
- Press crumb mixture into the bottoms of each lined or greased muffin cup.
- In a double boiler combine vanilla melts, cream, and prosecco.
- Stir frequently until completely melted.
- Remove from heat and cool for about 15-20 minutes.
- Beat in cream cheese till smooth and combined.
- Pour or spoon some filling onto the top of each crust, filling most of the way to the top.
- Chill cakes for at least 1 hour, or overnight.
- Serve chilled and celebrate!
Notes
Nutrition
Nutrition information is automatically calculated so should only be used as an estimate. Accuracy is not guaranteed.
This recipe was originally posted on December 27, 2018, but was republished with new photos, additional information about the recipe, step-by-step instructions, FAQs, and tips and tricks in December of 2022.


Steph Haussmann says
Love your page!
Liz says
Thank you so much, Steph! That really means a lot to me!